Dragon Quest (A.K.A. Dragon Warrior in the old days) is a role-playing series that has been around for a while, and gained notice by many in one way or another. Regardless of its status in various circles, this page is meant to provide tips/tricks, info, and suggestions on various games of the series, most particularly when dealing with different versions, such as NES/SNES originals versus DS updates. Spinoffs and info on them are also allowed to be posted here (Such as Monsters, Slime, and Swords). (If necessary, this page may be split into a slight few more entries.) If you're entirely new to the series, consider the following pages for more information on each game, and consider which one you might start out with:
Dragon Quest Wikia intro - Barebones rundown of what the series is like in general
Dragon's Den summaries - Short summaries of each game's concepts
Hardcore Gaming 101's articles - Kurt Kalata's extended rundown on the games from DQ1 to DQ8 and some minor info on the spinoffs
Personally speaking though, the most common starts are VIII on PS2 for easy accessibility and low price, IV on DS for a solid foundation of common series concepts, and IX for being beginner and vet-friendly all around. That said, there's nothing stopping you from starting with 1 and working your way up (though I'd start with the GBC or SNES version if I were you).
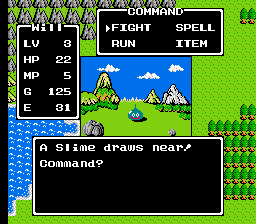
Dragon Quest I
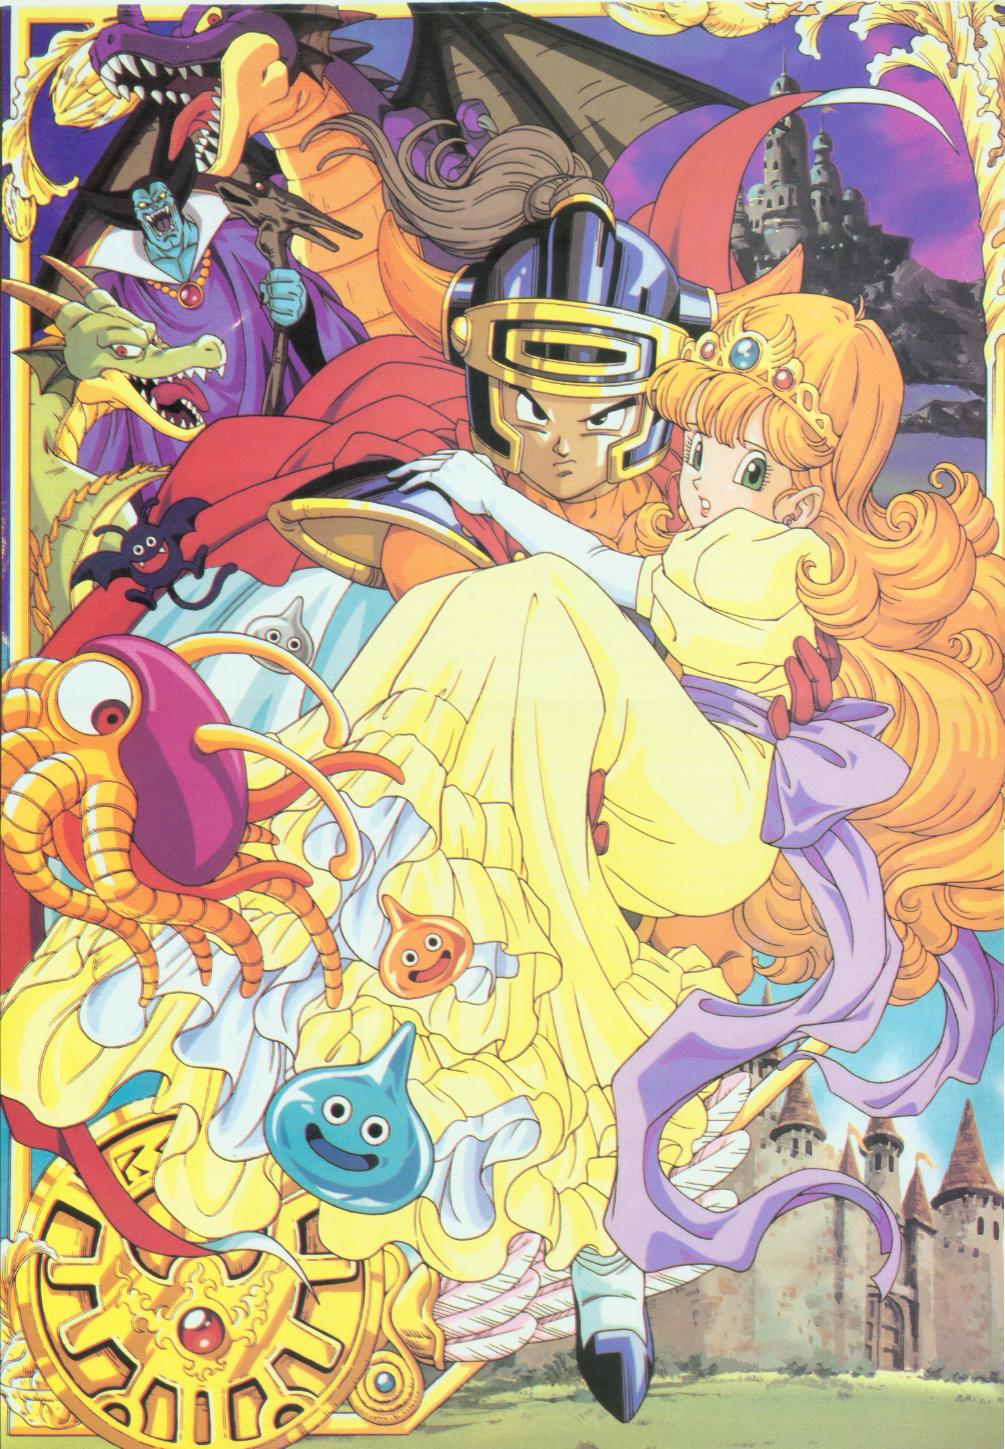
Save the motherfucking day while holding a princess.
-What's in a Name?-
FUCKING EVERYTHING, THAT'S WHAT. You want to name your character Hurr, DIKBUT, or something like that? Not so fast, derpface. Because your name will determine that stats you get at each and every level up. This may have you ending up more physically powerful, or with more HP and/or MP, and so forth. Curiously, it's said that "!" (Yes, just "!", sans the quotes, and with no spaces, additions, etc.) gives the most balanced stats you can get. Now granted, it's possible to finish the game with any name, this is solely for those curious enough to check it out. If you want to see just how this actually plays out with charts, check this out from the official guidebook:

What is this, I don't even
-Handy Items to Find-
Dragon Scale: 20G in stores, Raises defense just a tiny bit. Great early on, and who'd turn down extra Defense?
War Ring: Found in a Dungeon. Has been up for debate a while. It's generally agreed it makes you a little stronger, but it has also been noted to ward off weaker enemies and also make Critical hits easier to pull off. Whether these last two are true or not needs verification, per version and in general.
Choker and Devil Belt: Found in Dungeons. These curse you, so don't equip them. Instead, sell them for 180 (choker) and 1200 (belt) gold respectively. May respawn in the chests they were found in from time to time.
-Search All You Can! (Remix only)-
If you've ever played an RPG, you should know that there are hidden goodies all over the place. In the Remixes of 1, 2, and 3, you're now allowed to search suspicious areas for these. Some are less useful such as clothes, which are only good for selling, but some are invaluable, such as the stat-boosting seeds. In the Originals and Remixes, this is the only way to find the Loto/Erdrick gear and the Pixie Flute. Now, it's pointless to search on the overworld for stuff (The sole exception being the Loto/Erdrick token, which should be done only after getting the Lora's Love item), so only go out of your way in towns with dressers, pots, and suspiciously bare patches of grass.
-Personal Challenges-
So, you beat DQ1, eh? How about seeing if you can beat it with a challenge? Choose or mix any of the below.
1) Don't buy anything from stores except keys (otherwise, you couldn't win). Only use what you find!
2) NO SLEEPING AT INNS. There's no time to sleep on the job, that world needs rescuing! Saving your game is allowed though.
3) FISTS ONLY. FINAL DESTINATION. Beat the game using your fists and no other weapon. Can you do it? Magic is allowed, but not to deal damage.
-Websites of Interest-
Walkthrough and Extra Info - StrategyWiki's Dragon Warrior page.
Dragon Quest II

Jump into Adventure!
-Slot Bonanza-
There's 3 prizes specifically you'll want to get out of this.
The Best: Gold Card: Lowers costs of anything you buy witha 25% price cut. Very handy early on and even better later. Notes: It does not effect money you get from selling stuff and having multiple cards does NOT layer discounts.
2nd Best: Wizard Ring: You'll find some along your quest for sure, but why not have some as back up? You'll want to get these last though.
3rd Best: Wizard Wand: +27 Attack in the remix makes this a very nice weapon for Sumaltria/Cannock and Moonbrooke early on. Try and win at least 1 at the first slot machine you find. 2 if you can.
-Gold Orc Hunting-
Gold Orcs leave the most cash per death, but they are pretty strong when you first meet them. Not only are they tough, but they can heal themselves and allies too. If you've mastered Firebane, fighting them should be relatively easy, which makes it all the sweeter to rake in the gold.
-Falcon Sword: Original vs Remix-
Original: If you're playing the original, Cannock's Prince has a limited weapon range. While the Iron Spear has more base power, consider that the Falcon sword has much higher attack in the long run, since you hit twice with it, which is better for 3 things: 1) Metal slimes 2) Critical hits 3) Getting at least one hit in on fast monsters. If you have the spare cash, especially if you have the Gold Card, then go for it. If not, stick with the Iron Spear.
In the Remix, the Light Sword is Cannock's best raw-damage weapon. However, don't quite count the Falcon Sword out. Due to the way hits are transferred to the next enemy, it's technically a second attack instead of the usual combo-strike. This can make Midenhall/Lorasia and Cannock both good clean-up hitters for Moonbrook, potentially making your journey easier after learning Explodet. However, unless you want to try using two Falcon Blades to the end, it's best for Lorasia to just use a purely strong weapon like the Light Sword or Thunder Sword.
-Bolt Staff: Original vs Remix-
Original: In the NES version, the Bolt Staff is notably weaker than its Remix counterpart. However, there are two advantages to it above the Remix: 1) If you defeat the Mad Clown who has it in Midenhall's prison, sell it for 19500 GOLD, save your game, quit, then restart your save, the clown will be respawned back in prison again and have another Bold Staff ready to drop. You can keep doing this as long as you repeat the steps for mad gold. 2) Apparently, its item effect to cast Infernos is a guaranteed hit, even against those that may normally be unaffected by it. Unverified, but it wouldn't be surprising if this were the case.
Remix: In the Remix, the Bolt Staff's physical damage has been boosted up. It still only casts Infernos when used as an item though. WARNING: The Mad Clown/Magus IS A ONE TIME FIGHT this time around, which means: 1) You can't abuse him for gold. 2) If you lose, HE'S GONE. The only other chance to get a Bolt Staff now is to wait until the end of the game at Rhone, fight Magus enemies and hope they drop one, since their drop rate is quite low. If you saved before fighting the one in Lorasia prison, he'll still be there when you reload your save, so be sure to do that if you aren't sure how tough he'll be for you.
-Water Robe Issues-
The best armor in the game to put on your two cousins is the Water Robe. As long as you've got the Gold, Silver, and Jail Keys, you can get it pretty early. There are a few issues to mention ahead of time though:
1) The Dew Yarn in the northern Dragon Horn/Drakhorn tower is indeed on the third floor. HOWEVER! It is in a random location each time. As long as you keep searching, You should be able to find it eventually.
2) When the weaver mentions to "come back another day" or something akin to that, he means to save at a King, go back to the title screen/turn the game off, resume your save file, and return to him. It will be done then. Note that the Field Log in the Remix does NOT count towards "another day" you must save at a King or at least someone with the adventure journal.
3) ORIGINAL ONLY: There is a glitch to obtain a second Water Cloak, however, you must follow the proper steps to do so.
-Websites of Interest-
Walkthrough, Info, and Pictures - Again, a link to StrategyWiki, but this one is more fleshed out and flashy than DQ1's.
Dragon Quest III

"Besides, who can resist a sexy girl?" Damn right, Prima guidebook.
-Character Building-
Well, there's no sense in just randomly picking out allies. Let's get acquainted with them in the following notes.
Starting Out:
Unless you decide to attempt a solo run (NOT recommended for a first playthrough), you'll want to have some allies. In the original, your allies all start with preset stats, even when custom-made. In the remix, you can give your allies seeds to boost their starting stats. Obviously, you shouldn't give INTseeds to non-casters, but do consider giving seeds to cover some weaknesses amongst classes. For example, Soldiers are naturally strong and durable, but do not get very fast, so give them some AGLseeds. Another important factor in the remix is the Personality System, which affects your stats, some personalities more than others. You will find accessories to alter personalities while you wear them and books which permanently change the base personalities (but can still be altered by accessories).
Class Descriptions:
In all honesty, it's best to just have three main allies to the Hero(ine) and build upon those 3. If you really want to, consider having 3 more as backup for alternate specialties, but only consider doing this after you can level them up rather easily. Before you decide on your party though, it's best to consider the strengths and weaknesses of each class:
+The Warrior is a physical powerhouse. Good strength and stamina, and can equip alot of powerful gear. It tends to stay alive longer than anyone else. However, it tends to be slow, often going last in a fight and typically is only able to hit one enemy at a time. In addition, it can be kind of hard to keep up with the expensives of keeping it well-armed, as their heavy-duty gear can cost alot.
+The Fighter is a more offense oriented Warrior. High strength and agility assures that they'll move first, get critical hits, and dodge more often than nearly anyone else. However, their equipment options are lacking, which can make it hard for low-level Fighters to survive magic attacks until they get some more HP and better gear later on. On the bright side, they don't take as much gold to keep supplied.
+The Mage is pretty much the typical caster. Physically pathetic in stats and gear options, but an ace at offensive magic, especially when many of its spells hit several enemies. On top of that, it learns some very handy buffs, such as TwinHits/Bikill, which doubles an ally's offense and Increase, which boosts the party's defense. Very handy for beginners, and never really very expensive either.
+The Cleric, unlike the Mage, is fair at combat, and being able to equip quite abit of gear helps, too. Its spell range is rather versatile as well, not only including healing and curing ailments, but also has some wind spells, buffs, and debuffs. Sadly, the Cleric becomes lessening handy at combat later on. It's still an invaluable ally though, early on, especially to avoid paying for herbs and antidotes.
+The Dealer is an oddjob. It's fairly good at combat, and can equip some decent gear. They also find extra gold in battles. Early on, this is extremely helpful to get better gear. Later, it's not as handy. In the Remix, at least consider class changing to or from a dealer, as they learn the very useful YellHelp at Level 17, which summons an Inn, Church, or Shop on the overworld. It really is as helpful as it sounds.
+The Thief is only in the Remix. It has fairly impressive stats all around, especially with an INT-centric Personality, which may boost their MP skyhigh. It can equip alot of handy gear and has some helpful treasure hunting skills, along with randomly stealing (sometimes great) stuff from enemies. Consider class changing from one early and to one later on, especially if changing different units to and from.
+The Jester is a joke. Pathetically weak, and has a limited gear selection. As it levels up, it will ignore fights more often and goof off. However, it does have a huge Luck stat, which is very helpful for finding dropped loot from foes. However, it is the sole class that doesn't need a special item to become a Sage. Not recommended for beginners, though, unless you know what you're getting into. Note: You can class change TO a Jester in the Remix Only.
+The Sage is perhaps the best all-around class. It learns the spells of Clerics and Mages, can equip some pretty good gear, and has above average stats and is the best at magic. Do note that you can only class change into a Sage and only with a special item unless using a Jester. There are ONLY TWO of said items (you can't even steal any), so make sure you do not waste them.
Spell Mastery:
Depending on how you want to play, you may have very different plans in party formations than someone else. However, consider the Dharma Temple before you declare a final party. Any ally (except the Hero(ine)) can class change at minimum of Level 20. They start at level 1 with half of their stats from before, and all of their spells and skills. If you do not want to use it, that's fine too. However, it might be best to change once you reach the second world if you have not done so ahead of then. In general, if a class learns any skills/spells learn all of them before changing, that way, you keep your stats fairly high and have a better variety of spells and skills versus doing so at Level 20, especially since you would have to start BACK AGAIN at Level 20 to learn the skills you didn't get before changing. Also, note that learning is bound to a class. A Cleric that became a Fighter won't keep learning Cleric spells at 21+, etc. However, if a Warrior becomes a Mage, it will of course learn Mage spells. Lastly, Sages only learn spells they do not already know. Say if a Cleric became a Sage, it would learn Mage spells, but not its already known Cleric spells. It will learn the Cleric spells it did not know though. All of these examples are of course with regards to the respective levels of spell/skill learning of course.
-Parties and Planning Ahead:-
With regards to a Final Party, if you decide to class change, you may want to start with different classes than those you want to end with. For example, perhaps start with a Warrior or Fighter, then later class change them into a Mage or Cleric, that way, it is easier for said caster to survive in combat, while still having the benefits of spell learning. The Sage example aside, you can class change an infinite number of times, but remember to be aware of what your stats will look like from doing so, especially if you often class change at Level 20. Here are some general recommendations for changing to and from classes, along with some suggestions for specialty parties, if not your final parties.
Class Change Paths:
One final note before listing some class suggestions, I personally DO NOT recommend trying to make some sort of "Super-Badass" catch-all class that can do everything of every class. It takes WAY too long to do, even at Level 20, unless you're really patient and really good at hunting Metababbles. Here's some class change recommendations, along with some nicknames, given their specialties:
+"Battle Master": Warrior -> Fighter (or Vice Versa); This is perhaps the simplest and most purely physically powerful options you can consider. Not only do you balance the weaknesses of one class with the strength of the other, the longer you wait to change, the better the effect it will have. Just be sure to make a final choice between the two eventually, if you change multiple times.
+"Combat Medic": Cleric -> Warrior, Fighter, or Thief; While the you may be lacking in MP and INT unless you class change much later on, as long as you learn HealUs and Revive, you can have a very handy force on your hands. If you go Warrior, you won't usually end up dying before anyone else. If you go Fighter or Thief, you'll often go first and heal early, which is great after a harsh attack.
+"Ninja": Mage -> Thief (OR) Thief -> Mage -> Thief (NES: Replace Thief with Fighter); While Mages lack physical power, their buffs and skills can go a long way in faster, stronger hands. While the end result will not be as magically-strong as a Mage or Sage, the versatility makes up for it. Especially if using a weapon that strikes many foes. Buff up with Bikill, and you can see where this is headed.
+"Lucky Charm": Jester -> Dealer -> Thief (-> ?) (NES: Just remove Thief); Not be an easy choice for beginners, but if you're confident enough, you can get a character with good Luck, have some excess cash mid-game (along with YellHelp in the Remix), and some nice stuff from stealing. If you choose to go beyond Thief, the best option might be going Sage (preferably with an item instead of re-Jestering)
+"Super Sage": Mage -> Cleric -> Sage; While trying to raise all of your stats to be high up is ridiculously time-eating, making a balanced Sage is far less so, but still takes a while. Essentially, learn all as Mage before going Cleric, and Cleric before going Sage. The Mage adds a nice inital boost to MP and INT and the Cleric has fairly balanced physical stats, which gives the Sage an extra edge all-around.
+Wouldbe Hero(ine)": Mage -> Cleric -> Warrior or Thief; Like "Super Sage", but more balanced and less magical. If you're playing NES, go Warrior, if only for the great gear. If you're playing the Remix, by all means go Thief. You can still gain MP, be a great combatant, cover the magic bases better, AND steal some nice stuff. You won't have every skill or stat mastered, but you'll still be pretty good at damn near anything.
Starting Party Recommendations:
When it comes to choosing parties, pairing up allies from some of the paths mentioned above is a fairly good idea. However, let's get a little more detailed than that. Assuming you don't double up:
Warrior+Mage+Cleric: The party you're "given" to start with. Pretty good, just don't use those allies, and instead seed up some custom ones instead (in the Remix, of course). A good beginner party, but can be a bit pricey at times. At the very least, you shouldn't end up getting wiped out too often.
Fighter+Mage+Cleric: This is my personal recommendation for a beginner party. The Fighter is much more inexpensive than a Warrior, and generally better when it comes to speed and critical hits. The sole negative versus using a Warrior is that he might take damage more often and can't equip various "magical" equipment that can be used as items, but you won't notice until roughly mid-game, and by that time, you'll have class changed anyway.
Fighter+Thief+Cleric: This is what one could consider an "Intermediate" party. It's generally a little bit of everything. The weaknesses are obvious, especially without a Mage or defense-friendly ally. However, it's good enough to get through to Dharma temple if you are careful. Best used if you have a good feeling on what you'll be class changing into. Consider a Dealer or Jester for the NES.
Dealer+Thief+Jester: BIG MONEY, BIG PRIZES, I LOVE IT. Or I would if this party wasn't so vulnerable. Not an easy party to start with, and NOT for beginners. Still, you might use this party to comb through some safer areas for easy money from selling often-dropped loot. Or just grind a bit until they can survive going from place to place. Definitely consider Class Changing later though. Obviously Remix Only.
Or your own choice, of course. Definitely have a plan though, assuming you class change, which, again, you really should after entering second world if you haven't done so already.
-Beware the Pachisi Glitch! (GBC only)-
Only available in the remix. A glitch exists while playing the Pachisi board mini-game. Occasionally, you'll find a character's level to glitch and drastically shoot up, sometimes to level 99. HOWEVER, their final stats will actually be much lower than if they got their by naturally leveling up. With any other character, it's no big deal, as they can just class change and start anew, however, if your Hero(ine) was playing, THERE IS NO WAY to return them to normal without external modifications (cheating devices, etc.). This is very bad end-game, so if you do decide to play Pachisi with a Hero(ine), save first, or you'll find out the hard way just how bad this glitch can be for him or her.
-Metal Babble Beatdown- While Metal Slimes give some nice Experience Points, their Babble-based cousins give around TEN TIMES as much. However, they are also a bit craftier and tend to run more often. They show up before the second world around the town of Sioux (or that town with the Tribal dressed people), but in limited quantities, and you'll need a boat to get to it. In the second world, they show up more abundantly, specificially around the Rimuldar town area (town surrounded on all sides by water). By then, you should have learned the BeDragon spell. This is a real must-have when fighting these critters. Now, this won't always work (because they may run away before you use it), but if it does, you can take out a good chunk more in a single breath blast if you're lucky. This makes it easy to rake up experience mighty fast. Utilize this area and the Dharma temple to really boost up your party members. Alternatively: Equip as many allies as you can with Falcon Swords or insta-kill weapons (such as the Poison Needle) and spam attack like no tomorrow.
-Solo Run- Whoa, ho, ho. Slow down there, Captain Badass. Unless you've got Balls and/or Ovaries of Steel, you had best not do this. If you do, then here's a general heads up on the kind of stuff you should expect and know about:
Pros: 4x experience from battles (hey, there's nobody else to share it with), much cheaper shopping and thus more gold on hand, get better skills much more quickly, feeling of badassness
Cons: ABSOLUTE necessity to take advantage of the pros, instant death from Paralysis unless wearing protective/evasive gear against it, have to rely on items/weapons with special effects much more, Boomerangs become your best friend until you get Zap and Thordain, you'll likely have to have a guide handy to find hidden treasures since you can't use Thief skills, BALLS TO THE WALL HARD boss fights
Extra Advice: For the remix, loot those pachisi tracks early on and find as many mini medals as you can. Also, get a sexy personality if you play as a female for more well rounded stat growth (either through the personality tests or by equipping a Garter). For the original... start praying, because this is gonna suck. HARD.
This is pretty much the ultimate Hero's Challenge. Nothing will quite come close to being this badass other than self-inflicted challenges (technically speaking, outside of the necessary Dealer, you never have to use Ruida's tavern.) No matter how hard it may seem, it is indeed possible to beat this game alone. If you're ready, then go forth. Into the Legend, motherfucker.
-Websites of Interest-
Official GBC Enix Page - HOLY SHIT. Who would have thought this was still around? Not much content, but nice for a blast from the past.
Dragon's Den: NES GBC - Two pages from Dragon's Den, which appears often in this page. I had hoped for another page before going to that, but this is the best I know of.
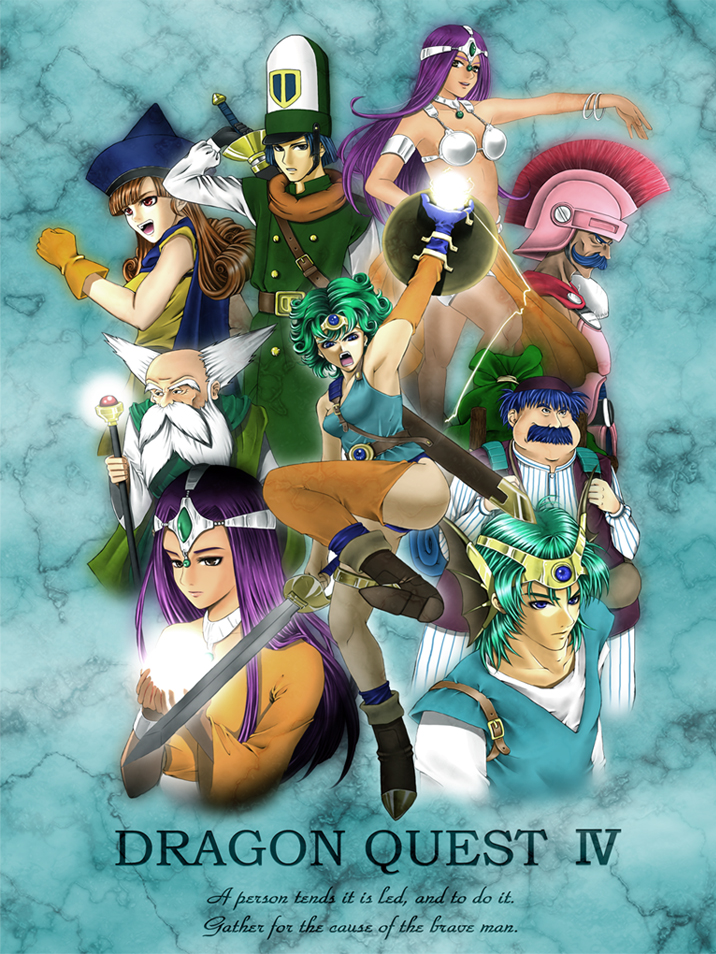
Dragon Quest IV
- Note: "Gear-Effect" used here is a short-hand way of saying "special effects of equipment when used from the item screen in battle", mostly since it takes up less space.
What they said.
-Tactics: Making Your Allies do Stuff-
In the NES, once you get to Chapter 5, your allies are AI-controlled except for the Hero(ine) (because that's YOU, the player, and your allies are characters with their own choices, but willing to follow your general strategies).
NES Tactics and what they mean:
Offensive- Physical Attackers go all out, ignoring their health and typically ignoring gear-effects, while your Magic Casters use their strongest spells unless someone is in dire need of healing.
Defensive- Allies with lowered HP heal, may use gear-effects, or defend. Attackers will attack when healthy, Casters focus on casting stat-boosts until everyone's fully maxed, then they'll use offense spells.
Normal- A mix between Offensive and Defensive. The choices made don't seem to depend on much of anything, making this the most balanced, but also second most risky as a result of you're not sure what they'll decide on.
Use No MP- Pointless for Attackers. Casters will strike physically and won't cast spells of any kind, but may decide to use gear-effects occaisonally.
Save MP- Something of a mix between Normal and Use No MP. Pretty uncertain to say the least. Probably the riskiest tactic to use, since it equates to "do whatever".
Try Out- Allies will concentrate on gear-effects. Pointless if they don't have any gear with special effects or the effects they do have are too weak to make a difference.
In the DS, you have the option of taking full manual control (Follow Orders) or setting tactics for everyone or individually amongst them. Thankfully, the AI has improved considerably since the NES.
DS Tactics and what they mean (US/European(maybe? I've seen two different versions...)):
Show No Mercy/Mercilless- Essentially go all out, regardless of MP costs or their current HP.
Fight Wisely/Act Wisely- Balance offensive and defensive actions. Like "Normal" of the NES game, but notably less random as it considers the situation of everyone first.
Watch My Back/Cover Me- Concentrates stat boosts and healing on the Hero(ine).
Don't Use Magic/No Magic- Normal attacks only and occaisonally items/gear-effects.
Focus on Healing/HPs First- Heal as quickly as possible, no matter how minor the damage. If everyone is fine, this seems to act similar to "Act Wisely".
Follow Orders- Complete control over ally's decisions. Unless you're feeling a bit lazy or nostalgic, this is definitely the way to go. A mandatory choice in boss battles, which have become rather difficult since the NES.
-Breakdown: Ally vs Ally (Original)-
Ragnar vs Alena: In terms of III's classes, Ragnar is akin to a Warrior and Alena is a Fighter. Honestly, both are GREAT physical fighters. The trade-off between choosing one over the other is Ragnar's Gear, Gear-Effects, and Defense versus Alena's Criticals, Power, and Agility. If Ragnar has any gear that has special-effects, he tends to use them. This is handy if he can use healing or damaging spells, but not with those that don't (such as Expel and Sleepmore). The Sword of Miracles is a keeper for him, as the HP-draining with his high DEF and HP means its rare to see him die. With Alena, her raw offensive and high critical chance is wasted using gear effects. Especially since she often goes first anyways, meaning she can often end a battle versus a single foe in one attack. Stiletto Earrings' double hits are better for pure damage because of this. Regardless, Fire Claw has its uses against random battles, as it can cast Firebane. In battles with bosses or tough foes, stick to the earrings. A power-centric party will have both Ragnar and Alena in it, which is far from a bad choice indeed.
Brey vs Mara: In terms of Wizards, you have a Cool old dude versus Hot dancer gal. Normally, not a hard decision, but consider this: Brey gets the Ice family of spells, Sap+Defence (Sap on a group of foes), Bounce, Bikill, and Speed Up, while Mara has the Fire-, Blaze-, and Explosion families of spells, and BeDragon later on. The choice here arises from the number of the enemies you'll be fighting. If you're fighting lots of enemies, Mara can attack them all with her fire spells and explosions. Brey doesn't do as much damage with his ice spells, and only hits groups except for Icespears, which does less damage than Explosions. If you're up against a boss, then its time to use Brey for his boosting spells. The later Blaze spells indeed do high damage, but the issue is that against strong enemies, Mara is easily taken down due to having THE lowest HP out of everyone. With Bikill, Brey can buff your physical fighters to do just as much damage, if not more, than Blaze-ing them. Just exchange them when needed and both will be useful. Mara and BeDragon are best used on Metal family of Slimes, since it can damage them directly.
Cristo vs Nara: Both are Priests, both being about as equally good at Combat Medic-ing. However: Unless you have your tactics to "Defensive", then you'll witness Cristo's "Legacy" as a death spell spammer soon enough. As you can guess, this is pointless against bosses. However, he is the only one to learn Upper+Increase (boost party DEF), Healus, and Revive. Late-Game, these are invaluable. Nara is generally better at being all-around. She can use Wind magic, and later gets Barrier (reduce Fire and Ice damage) and Farewell, which sacrifices her life and all her MP to fully heal and revive everyone else who is dead. Before Cristo learns his last two spells, you should definitely stick with Nara. After that, it becomes an issue of who else you are using at the time, be it weaker casters or stronger attackers. If you give Nara the Sage's Stone, this is somewhat averted, but only at end-game and you're better off using it yourself. As for the Silver Tarot Cards, some of the effects are great, such as Double Gold and EXP or Healusall, others... well, be ready to risk a game over. She won't use them much unless Try Out is selected, though.
Taloon vs Doran (End-game): A middle-aged merchant who likes to do random things or a powerful dragon who's lazy. Well, it's easier to break it down and decide for yourself. Doran has the advantages of being a real dragon, and as such, can take fire and ice damage better than most members, deals decent damage physically, and deals direct damage with his breath blasts. This is great versus Metal Slime enemies. Of course, he may also just sit around and do nothing for a turn as well. Taloon is fairly good physically at later levels. However, his real "strength" comes from the actions he may pull off: Trips (Assured critical hit on a random enemy), Lullaby (puts all foes to sleep), Strange Dance (lowers one enemy's MP), Throw Sand (0MP Surround on all foes), Yell Calm Down (0MP Expel on all foes), Sweep Legs (trip one foe for a turn), Finger Hypnosis (confuse one foe), Tell Joke/Shout (can make all foes skip a turn), Build Up (doubles his next attack's damage), OR stand in a daze and do nothing. Not quite as certain as breathing fire/ice, but these are pretty damn handy (except the daze). These last four get special mention:
1. Take damage for a random ally- Regardless of whether they need it or he can take it without dying. Still, not too shabby, especially if the ally protected actually DID need protection.
2. Steal an Item- Rare to pop up, but if done against Metal Babbles, you get a Hat of Happiness (heals wearer's MP each step taken) and from Metal King Slimes, you get a Metal Babble Helm (strongest helmet)!
3. Calls a Merchant Army- Tied with the 4 for being totally badass. Merchants deal 3 hits worth of Taloon's Attack against random enemies (or 3 on one). Have a Sword of Miracles equipped, and you drain HP from each strike!
4. Cover an Enemy's Mouth- Essentially cancels an enemy's spell that was about to be cast. What makes this so great is it DOESN'T cost Taloon his turn unlike his other actions, meaning he can still get a hit in before/after this.
-Breakdown: Ally vs Ally (Remake)-
Now that you have full control of your allies, you can take advantage of their strengths more fully versus their weaknesses. Most of the stronger points are the same as the NES, so let's just focus on what's new for this.
(Oh, and just for reference: NPC's are pretty much pointless to use unless you have to for story events. Reason being is that they are still AI-controlled.)
Ragnar vs Alena: Now that you can manually make allies choose to use a gear-effect or not, the sole choice you'll have to make between these two is Defense versus Offense. Again, it's probably better to use both, as long as you don't mind holding onto extra stuff in battle and potentially having a second caster sit the battle out. End- and Post-game, you should consider having at least one of them in your party at all times.
Borya vs Maya: Well, the differences between these two pretty much haven't changed at all. Being able to control when Borya uses his stat boosting spells puts alot in his favor, but Maya is still great for random battles. I have been able to verify that Puff!/BeDragon DOES NOT on Metal Slimes in the DS game like it did in the NES. So have her use Poison Needle or Falcon Knife Earrings on Metal Slimes instead.
Kiryl vs Meena: Kiryl is pretty much your best friend now that he won't spam death spells unwisely. Kabuff will keep your party safe against physical assaults, Multiheal is cheaper and better than ever, and he's the only one to learn Kazing until post-game. Meena's wind spells still pack a decent punch and ONLY she learns Insulatle. However, she doesn't get Multiheal or Kazing, so she'll only be able to heal one ally at a time. Kerplunk isn't bad, but less useful than it used to be. The Silver Tarot Cards HAVE improved though, with many positive effects replacing the old negative ones. However, beware the Fool, which casts Thwack on your party, putting them at risk of death!
Torneko Taloon (in general): "Well, since I can control everyone, I must be able to control his various actions, right?" Nope.jpg. However, he tends to goof off a bit less often now. Tripping an enemy, when successful, now seems to give a better chance of critting that enemy before they get up. In addition, when tripping a foe, there's a chance that he himself may trip and deal a critical hit or choose to steal afterwards (rare though). The Sand Toss, Calm Down, Merchant Army, Mouth Cover, and Taking Damage for an Ally actions are gone. However, he has a better chance of stealing because there's less to choose from! He also has some new overworld skills: Padfoot (0MP repel, but slightly ups chance of being surprised), Eye for Distance (finds the closest town, building, or cave and tells where it is), Nose for Treasure (how many chests are left unopened in the immediate area), and Whistle (instant random battle). Once again, he's pretty useful when he's not goofing off, but for a serious battle or going against a boss, you may consider using someone more certain. Do note that his random actions CAN work on bosses though.
Psaro (Post-game): The Big Bad Boss, now at your command. There's not really much point to argue his position on a team. He gets nearly all of the strongest healing and damage spells, great physical skills that nobody else has, can equip cursed gear no problem, has great stats, and he has a rather catchy theme song. No matter how you look at it, he's going to replace one of your teammates. Despite being able to fill any role, you should stick him to one, and have your other two allies concentrate on things he probably won't do as often.
-Pioneer Town and Medal King (DS only)-
+Pioneer Town Basic Info+
Like DQ3 and DQ7, you can help someone start their own town in DQ4DS. At a later point in Chapter 5, return to where the Desert Bazaar was, and you'll find Hank Hoffman Jr. attempting to build his own little city. Help him out along your quest, and you'll be able to gain access to lots of handy little treasures as the town grows (particularly Mini Medals!). Some shops also sell some great gear later on, and you'll eventually see the town start a second casino, with its own fabulous prizes! It's a bit hard to track down everything, so you may need to look up a guide for that, especially the hidden treasures in the town's different stages, as some can be lost forever if you don't.
+Medal collector King Minikin+
Similar to the original DQ4, there's a collector of Mini-Medals you'll find as you quest about. UNLIKE DQ4NES, you do not trade medals in for your choice of gear! Instead, you give him all of your medals, and get one special piece of gear at different intervals of trade-in. This may sound kind of lame, but the prizes are a lot better than they used to be, some of which are exclusive to the DS game.
-Websites of Interest-
Illustrated Walkthrough - An incomplete walkthrough of DQ IV DS. Mostly handy because of the pictures which point out things you may miss or overlook, particularly in the "Pioneer Town".
Text-Based Walkthrough - A text based walkthrough that's actually pretty competent and easy on the eyes. The use of wiki-type buttons lets you jump to sections much easier vs. scrolling about.
Dragon Quest V

"Promise me you'll be careful."
-Play that T'n'T! (DS version only)-
Traps and Treasures (or something like that) is the new name for the "Pachisi" boards from the older games. Added for the DS release, these seemingly silly little board games can hold some valuable treasures in them; And not only in the chests throughout the chest/jar/drawer panels or the victory trove at the end, but also in the shop panels. Some of these items are purely exclusive, and can't be found anywhere else (or for some, at least not without excessive effort). Don't bother putting them off until post-game or anything like that, as they can really give you a leg up on foes early on.
-Monsters You'll Want and Why (+Where and When to Find Them Earliest)- You are unable to recruit monsters as a child. So, let's skip ahead to when you can. The monsters listed below aren't the only ones you should recruit (filling up your wagon is the best way to survive, after all), but if you can get them, then you'll be defintely be playing with power.
Obtainable 2nd Generation (Pre-children):
Slime Knight- Coburg area (Reason: One of the best all-around-ers that may ever be in your party. It's usefulness can even last long enough to fight the final boss!)
Healslime- Fortuna area (Reason: One of the earliest to know Multiheal, along with a variety of other helpful spells. Lags later, but great to keep your party healthy early on.)
Obtainable 3rd Generation (Post-children):
Golem- Lofty Peak area (Reason: This thing is a TANK. Not only does it have huge HP and DEF, but its power and skills are great too. One use of its Meditation at low HP and it's good to go!)
King Cureslime- Stairway to Zenithia (Reason: While Healslime can overpower him MUCH later on, the King has better stats and spells for when it counts: NOW.)
Great Dragon- Precaria area (Reason: Has excellent stats, resistances, and attacks. Unfortunately, it takes a while to level up. Be patient though, because it will pay you back with its raw power.)
Killing Machine- Precaria area (Reason: Has resistances out the ass. Damn near no spells will hurt him and his physical stats can be quite the cut above the rest. He can use some nice gear, too.)
Post-Game:
Barbatos- Estark's Labyrinth (Reason: Has some of the most powerful spells, good stats, and can equip great gear. Be warned, it can take a LONG time to get one.)
Starkers- Gotten after beating the Stark Raving Mad T 'n T board. (Reason: Gets some great skills and stats. Eventually one of the strongest monsters in the game, if not THE strongest.)
ReBjorn- Get Starkers and return to the Pothold to get him (you may need to talk to a turban'd NPC in Mostroferrato first). (Reason: Almost as good as Starkers, provided you can raise him with 8 HP...)
-A Weapon for Deborah (DS version only)-
As you might have known by now, the fabulous Deborah is the new 3rd marriage candidate. She has exclusive gear of her own and is something of a Support-Fighter. She isn't up to say, Alena's power potential, but she can hold her own pretty well. If you choose her, the two generally-agreed-to-be-best weapons for her to equip are the Diamond Akillics, which let her hit twice for nice damage, and the Hela Hammer, which only hits half the time, but always criticals. Realistically speaking, you probably won't get the Gringham Whip anytime soon (but if you can, do so then), due to its 250000 casino token price tag, and as for the Miracle Sword or Faerie Foil, she doesn't tend to have enough strength to take advantage of either. You won't get any of her better gear for a while, so just stick with her normal Akillics until you get that Hela Hammer.
-Websites of Interest-
DQ Translations - Translation page for the PS2 version DQ5 if you're interested in that. Also has patches for DQ3 SNES and some DQ-like games, such as Glory of Heracles III. These are mostly complete, though a bit rough on the edges (some parts have errors). The PS2 DQ5 translation has better attention paid to it, with multiple updates released for it.
Dragon Quest VI

"Estoy preparado."
-Alltrades Vocations and You-
+Basic Info+
Sadly, the Alltrades Abbey isn't available until after you beat Demon Lord Mudo/Murdaw, the first major story boss of the game (you should know this already). HOWEVER, this game uses a new system of changing classes/vocations over DQ3's: Characters keep their levels, base stats, skills+magic, and are able to equip anything they could before changing. On the flip side, your active stats are increased and decreased according to the specifications of your new learning experience (example: Warriors have boosted physical prowess, but their MP and Wisdom is sharply reduced) and in order to learn new skills, you must fight battles "that count".
+"That Count?"+
Let me clarify: Within each area there is a game-imposed "effort limit". Now, this won't stop a character from leveling up, BUT, once they surpass that limit (say they just hit level 17 and the effort limit is 16), they won't be able to gain anymore skill points from battling in that area. When you reach a new area with a higher limit, that character will once again gain skill points until reaching the new limit, then you find a new area once more, and so on and so forth. There is NO indication of what areas have what effort limit, but you should progress well enough alongside it without worry. If you are kinda worried, check HERE for a list of limit caps, though it is surprisingly lenient. If you want to know how close you are to reaching your next skill level, talk to the fortune teller NPC at Alltrades. She'll tell you how many more battles you need for each character to get a new vocational promotion.
-DS "Slime Buddies"-
- Note 1: Lizzie the Hackasaurus is a special monster that can only be recruited by revisiting a Arkbolt prison with Terry in your active, on-screen party. As long as you have Terry with you, just talk to her and she'll join. She gets really good skills, has really good resistances, is able to equip a variety of gear, and has great stats. Above all that, though, is that she starts out pre-equipped with the Dragon Vocation and can change vocations as well. Definitely have her in your wagon, if not your main party. She also has party chat, which is cool. Here is her maximum level, her best skills/spells, and the (non-skill) levels each are learned:
??. Lizzie (99); Best Skills: Falcon Slash @ L1, Hatchet Man @ L9, Metal Slash @ L20, Kazing @ L25, Scorch @ L30 (also learns with Dragon Vocation)
- Note 2: All Slime Buddies besides Lizzie sadly have somewhat restrictive equipment sets. However, like her, they also have some natural resistances to spells and elements. Their stats aren't too shabby either! They also learn a few spells and skills naturally, regardless of class, so don't waste effort, for example, making Healie into a Priest and leveling up his skill points. This makes them pretty good substitutes for your human allies, although that's entirely up to you. I wouldn't personally replace members until beating the game once, just because they don't party chat and only repeat a few lines.
- Note 3: After winning the top cup at Slimopolis, you can recruit Goober, a normal blue slime, by talking to "Sledge", the slimopolis owner. Goober doesn't have hardly any resistances, but he gets pretty strong, levels up VERY quickly, and starts with some decent spells. At Level 45, bring Goober back to "Sledge", who gave Rookie to you to begin with, and he will learn C-C-C-Cold Breath, which is better than his final skill at level 90. Here is his maximum level, his best skills/spells, and the (non-skill) levels each are learned:
??. Goober (99); Best Skills: Frizzle, Sizzle, AND Kabuff @ L20 (start), Crystal Breath @ L45, Scorching Breath @ L90 (Yes, it's seriously Level 90)
SFC: If you want to recruit monsters, you must have a Beastmaster in your active party. There's only 18 "non-special" monsters to recruit and they have widely varying recruit chances (Metal Babbles have a 0.4% chance of joining. 1/256 for fuck's sake!). Unlike DQ5 or DQ5DS, they don't seem to get easier to recruit each battle either. Outside of Dragon's and Metal Babble's unique skills, you can learn anything monsters learn through Dharma (and later special books for Dragon and Metal Babble). Anyways, here are the other monsters, their maximum levels general rating of how hard they are to recruit, their best skills/spells, and the (non-skill) levels each are learned:
01. Bomb Crag (30); Recruit Rate: Average; Best Skills: Magma @ L15, Meditate @ L30
02. Boss Troll (99); Recruit Rate: Average; Best Skils: Tremor @ L15, Protect @ L20, Rockslide @ L30
03. Dark Horn (99); Recruit Rate: Average; Best Skills: Stop Spell @ L5, Power Up @ L10
04. Furrat (99); Recruit Rate: Easy; Best Skills: Firebane @ L18, Bounce @ L20, Absorb @ L25, Firevolt @ L30
05. Healer (99); Recruit Rate: Easy; Best Skills: Healall @ L15, Healus @ L18, Healusall @ L23
06. Killer Machine 2 (66); Recruit Rate: Hard; Best Skills: Spinning Sword @ L4
07. King Slime (99); Recruit Rate: Average; Best Skills: Wind Up @ L5, Revive @ L15
08. Lamp Demon (99); Recruit Rate: Hard; Best Skills: Increase AND Bikill @ L10, Barrier @ L12, Healusall @ L18, Air Wall @ L23
09. Lesser Demon (99); Recruit Rate: Easy; Best Skills: Defense AND Eerie Light @ L5, Bolt @ L15
10. Lipps (50); Recruit Rate: Easy; Best Skills: Dark Lick @ L7
11. Metal Babble (16); Recruit Rate: VERY HARD; Best Skills: Madante @ L7, Big Bang @ L14
12. Mud Doll (99); Recruit Rate: Easy; Best Skills: Increase @ L13, Hide @ L20
13. Rotting Corpse (50); Recruit Rate: Easy; Best Skills: Toxic Breath @ L10, Defense @ L13, Death Dance @ L25
14. (Non-"Rookie") Slime (99); Recruit Rate: VERY EASY; Best Skills: Scorching Breath @ L90 (Yes, it's seriously Level 90)
15. Slime Knight (99); Recruit Rate: Easy; Best Skills: Increase @ L8, Power Up @ L13, Hide @ L18, Double Slash @ L25
16. Super Tensk (99); Recruit Rate: Easy; Best Skills: Death Dance @ L15, Stillness @ L20, Life Song @ L27
17. Wind Mage (30); Recruit Rate: Hard; Best Skills: Firebane @ L20, Infermost @ L25
18. Wyvern (30); Recruit Rate: Average; Best Skills: Healall @ L20, Blizzard Breath @ L30
DS: Since you could only recruit 18 monsters anyways, the recruitment by Beastmasters is pretty much ditched (and contrary to popular belief, they have NOT been made into a FF-style Blue Mage class either). To make up for this, "Slime Buddies" have been introduced. Each one has their own little story and sidequest to recruit them. From what I've roughly gathered, it seems they do have at least some dialogue in party chat that isn't just repeating a few phrases over and over again. The ones that have appeared before have the same stats and skills as before, but a few have been altered slightly, and will be noted. Regardless, here they are and here's how to recruit them:
Slime Knight (Pierre) Requires the Magic Key
Healer (Hoimin) Requires the Flying Bed (Behind the Weapon/Armor shop in Dream world Clear Vale)
King Slime (Kings) Beat Rank 7 of the Style Contest (At the bar in the Style Contest building)
Slime (Rookie) Defeat Rank H of the Slime Arena (Same as the SFC version)
Metal Babble (Hagurin) Requires at least 20 people in your Surechigai List (In the Surechigai Dungeon) (Note: Surechigai is roughly "Tag Mode" or "Canvassing" except this time you have a dungeon instead of an Inn)
The following are New Slime that could not previously be recruited. As such, I -will- go into detail about these fresh faces:
Spotted Slime (Buchisuke) Finish Castle Grace quest? (Located in the Real World Grace Castle [somewhere]
??. Buchisuke (99); Recruit Rate: N/A; Best Skills: Repeat @ L9, Whistle @ L11, Rest @ L15, Berserk @ L17
Curer (Behoman) Requires at least 10 people in your Surechigai List. (In the Surechigai Dungeon)
??. Behoman (99); Recruit Rate: N/A; Best Skills: Fullheal/Healall @ L1 (has it when he joins), KaZing/Revive @ L17, Multiheal/Healus @ L20, Omniheal/Healusall @ L50 (Yes, 50.)
Marine Slime (Marrin/Marilyn) Have Behoman in your party.
??. Marrin/Marilyn (99); Recruit Rate: N/A ; Best Skills: Kabuff/Increase @ L1 (has it when she joins), Blizzard Breath @ L33
-Mad Skills and the Classes that Learn Them-
- Note: "SL" is used here as short-hand for "Skill Level". Skills/Spells with a "(!)" are some of the better, if not best, skills/spells you may learn. (?) denotes highly variable quality. The others are still quite useful to know though. And no, I'm not sure why Windup and Powerup do the same thing.
+Normal Classes and Notable Skills/Spells+
Beastmaster- [SL8] BeDragon spell (Transform into a dragon. Become fire and ice resistant, and randomly do a hard physical strike or breath fire)
- Required to recuit monsters in 6SFC.
Dancer- [SL5] Hide skill (raises user's evasion of physical attacks), [SL6] Stillness skill (stops enemies from using their dances on you), [SL7] Robmagic Dance skill (drains MP from a foe), [SL8] Death Dance (decent chance to kill all foes (chance is determined individually, not the collectivity of monsters))
Fighter- [SL2] Spin Kick skill (strikes a group, similar to a Whip attack), [SL5] Spirit Punch skill (strike one foe with chance of high damage, but tends to miss), [SL8] Swordline skill (!) (Attacks 4 times on random enemies)
Goof Off- [SL2] Whistle spell (summons an instant random battle), [SL4] Flasher skill (mostly for fun, but females CAN stun enemies with it), [SL5] Rest spell (!) (user regenerates HP and MP, but starts the next battle asleep), [SL7] Repeat skill (?) ("repeats the last action", similar to Mimic of other RPGs, but I can't recall if it uses MP or not)
- Note: Much like in DQ3, the Goof Off will not always do an intended action while under this class, even when under manual control. Thankfully, they don't take too long to master.
Merchant- [SL1] Identify spell (?) (checks info about an item or piece of gear, not bad if you don't have a walkthrough open every time you play), [SL2] Windup skill (!) (boosts damage dealt by your next physical assault by 50%), [SL7] Caravan spell (?) (summons the last store you were at, not sure if this also works with inns and churches like DQ3)
Priest- [SL2] Antidote spell (cures one ally of poison), [SL3] Upper spell (boost one ally's DEF), [SL4] Numboff spell (cures one ally of paralysis), [SL5] Increase spell (!) (boost ALL allies DEF), [SL7] Healall spell (!) (heal one ally to full HP), [SL8] Vivify spell (50% chance to revive one ally at 50% HP)
Soldier- [SL1] Powerup skill (!) (boosts damage dealt by your next physical assault by 50%), [SL5] First Strike skill (attacks first, but does less damage than normal), [SL7] Double Slash skill (!) (2 hits on one foe, 4 when using Falcon Sword), [SL8] Magiblade skill (!) (50% hit chance, but critical hits when successful (great versus Metal Slime enemies!))
Thief- [SL2] Hawkeye spell (tells where the nearest town is), [SL5] Mapreader spell (tells you what dungeon you're in (good for backtracking to find missed loot)), [SL6] Sneak spell (!) (avoids fights when travelling (lasts a bit longer than Repel, but slightly raises chance of being ambushed)), [SL7] Goldsniff spell (tells how many treasure chests remain unopened), [SL8] Locate spell (!) (causes hidden treasures to shine briefly (great for finding Mini Medals))
- Note: Thief is the sole class capable of stealing after battles. This is a seperate event from item drops, meaning you can potentially get TWO items from one monster. The rarer, the better.
Wizard- [SL4] Defence spell (lowers an enemy group's DEF), [SL5] Boom spell (decent neutral spell damage to all foes), [SL8] Firevolt spell (above average fire spell damage to a group) and Bounce spell (!) (target reflects spells back to sender (not to the caster of Bounce, but back to the subsequent casters attacking or healing the ally with Bounce on) for a few turns)
+Special Classes and Notable Skills/Spells+
Hybrid (master the two noted classes for each you can become it)
Battlemaster (Soldier+Fighter)- [SL2] Zombiecut skill (extra damage to undead), [SL3] Hide skill (raises user's evasion of physical attacks), [SL5] Jump Kick skill (!) (pierces guarding AND does extra damage to bird-ish foes), [SL6] Dragoncut skill (extra damage to lizardly foes), [SL7] Rockslide skill (throws boulders at all (?) foes, doing above average physical damage), [SL8] Metalcut skill (always damage Metal Slime foes slightly when it hits, rarely misses)
Magic Knight (Soldier+Wizard)- [SL2] Bikill spell (!) (DOUBLES an ally's Attack stat!), [SL3] Electric Slash (hits a group with a physical lightning strike, most enemies have no resistances to lightning) [SL4] Reflect spell (!) (casts Bounce on the entire party, great against magic-spamming enemies and bosses!), [SL8] Blazemost spell (!) (strongest fire spell against a single foe, outclassed later by Lightning spells, but still much cheaper than using those)
Paladin (Fighter+Priest)- [SL1] Defend skill (!) (personally cover one ally from all offensive assaults that turn, very nice if the Paladin has boosted resistances), [SL2] Vacuum Blade skill (!) (hits all enemies for damage roughly equal to a normal attack, but doesn't lower per foe hit!), [SL3] Berserk (raises own Attack, but lowers own DEF, best used if a caster can't use Bikill), [SL5] Magiward spell (!) (reduces spell damage taken by party, beats Reflect when you need to heal with Healus), [SL6] Protect skill (!) (personally cover ALL allies from all offensive assaults that turn, but monitor your HP!)
Ranger (Thief+Merchant+Beastmaster)- [SL1] Repel spell (!) (avoids fights when travelling, best used when travelling, and if you want/need to fight use Whistle), [SL2] Toxic Breath skill (damages all foes and poisons them, damage increases proportional to user's level), [SL3] Stepguard spell (!) (avoid taking injury from damaging floor surfaces, beats spamming Heal any day), [SL8] Air Wall skill (!) (reflects breath attacks back to sender, not bad since the breather can usually take damage from their own breath, if only slightly)
Sage (Wizard+Priest)- [SL1] Absorb spell (caster heals the MP required from a spell used on them, both offensive and beneficial), [SL2] Barrier skill (!) (reduces damage party takes from fire and ice spells and breath alike), [SL3] Bikill spell (!) (DOUBLES an ally's Attack stat!), [SL5] Healus spell (!) (casts a slightly stronger Healmore on all allies, a must have for late-game), [SL6] Revive spell (!) (always revives an ally with full HP) and Snowstorm spell (great ice spell damage against groups), [SL7] Magiward spell (!) (reduces spell damage taken by party, beats Reflect when you need to heal with Healus), [SL8] Explodet spell (Great neutral spell damage against all enemies)
Superstar (Dancer+Goof Off)- [SL2] Ironize spell (!) (turns party invincible for a while, great for studying enemies and bosses to form a strategy) [SL3] Bolt skill (Decent lightning spell damage to one enemy, most enemies have no resistances to lightning), [SL5] Eerie Light (?) (reduces the power of enemies' spells; good, but seems to vary in degrees of effectiveness against bosses), [SL6] Hustle Dance (!) (Multiheal at no cost! Use it in easy battles to get your party back at maximum HP with little, if any, risk.), [SL8] Life Song skill (?) (revives all allies for 20 MP, though I'm not sure if this uses Vivify like DQ7 or Revive fo bring back your allies' HP)
"Secret" (Special requirements to use)
Hero (Master Battlemaster, Ranger, Sage and Superstar to use (The Main Character only has to have one of these mastered to become a Hero))- [SL2] Nullify skill (!) (remove all helpful magic boosts from all enemies!), [SL5] Meditate skill (!) (user heals a high amount of their own MP for VERY cheap), [SL6] Gigaslash skill (!) (VERY high raw damage on one enemy, but costs a heavy 20 MP), [SL7] GigaSpark skill (!) (Hits all enemies with VERY poweful lightning, even beating out explosion spells!), [SL8] Megazap spell (?) (Causes extreme damage to one enemy, but costs everyone 10 MP and their respective turns to use; it's pretty situational, since you can eventually get strong enough to cause more damage all together, instead of collectively like this spell requires)
Dragon (Have the Book of Dragons in a character's items (received from a few prizes during the game and/or the shop in Deathcod))- [SL7] Scorching Breath skill (!) (Massive fire damage to all enemies, though its power is respective to the user's level) [SL8] Crystal Breath skill (Massive ice damage to all enemies, though its power is respective to the user's level)
Metal Babble (Have the Book of Babbles in a character's items. One found post-game in a certain area shown in the ending. You can get more if you beat MOTHERFUCKING DARK DREAM/NOKTURNUS. Good fucking luck.)- [SL6] Madante spell (!) (dumps all of your MP to do 2x (3x in the SFC game) that amount spent in direct damage to all enemies, insanely effective if you have multiple Elfin Elixirs on hand) [SL7] Gigaspark spell (!) skill (Hits all enemies with VERY poweful lightning, even beating out explosion spells!) [SL8] Big Bang skill (!) (attacks all enemies with colossal damage, this skill is exclusive to the Metal Babble, but very worth learning).
-Websites of Interest-
RPG Shrines' DQ6 Page - Will become a bit outdated when the DS version gets translated, but still totally great as a base support. Not quite as cool as the DQ7 one, but still damn good.
DQ6DSJPCM (extended) - An extended version of the GODTIER commercials of the for the DS game. FUCK YEAH. Translation. Parodies: 1 2
Dragon Quest VII
Over 10 years of making people rage, cry, and laugh.
-Play at a Leisurely Pace-
Trust me, this is not a game you'll want to speedrun. Not only is it very hard to do, it's also irritating to handle this much game at once (trust me, I know first-hand). Besides, when you take it easy, you won't miss any of the hidden things you might have overlooked and you may even find out story details that won't ever be explained without your own exploration. This game gave DQ Party Chat for fuck's sake. Just chill and take it slow.
-"Wait, where's the wiki content?"-
...Okay, you got me. This game has content out the ass. You think I want to do a page about it all, especially when there's parts of it I haven't even managed to accomplish, such as Monster Classes? FUCK. NO. It would make this page gigantic if I even THOUGHT about doing that. Thankfully, some brave souls actually did manage to document a player's guide worth of info, advice, pictures, and so forth all in convenient website format. Just click the link below and watch me get humbled like a chump.
-THE DQ7 Website to End Them All (and some others)-
DQ7 RPG Shrine - I wish I had known about this when I played. Thankfully, you can experience DQ7 without hairpulling frustration!
Dragon's Den - Subsidiary to the RPG Shrine, IMO. Notable for its handy walkthrough with pictures.
Dragon Quest VIII

You know a game has too much porn when this is the coolest SFW party image I could find. Thanks, Jessica.
-Figure Out Your Skill Paths EARLY-
Skills are all sorts of cool, but unless you've got good luck at finding/stealing seeds of skill, they can take a long time to get. So let's analyze some of the characters and figure out some of the easier and more advanced paths to take.
+Hero+
Mandatory:
100 in COURAGE. You get some handy spells from it, such as Zoom-ing back to town, the Zap family of spells, and one very handy one: OMNIHEAL. This is crucial for hard battles later on. But what's best is leveling this skill up eventually reduces the MP costs of ALL the hero's spells to half! If you chose Spears, this means you could use Lightning Storm at 11 MP! Gigathrow can't even compare, no matter how cheap it gets! If you level up Swords and this to 100, GigaSlash becomes GigaGash, doing massive damage to one foe instead of a group, but at least Kazap (100 courage) will still hit multiple monsters, so it evens out.
11 in FISTICUFFS. This nets you the Defending Champion skill, which reduces physical damage the hero takes on his turn to 10%! Very handy if he's about to die or you aren't sure what an enemy may use next. Beats guarding anyday.
DON'T MAIN BOOMERANGS. It's not a good idea, trust me. Even at their best, Boomerangs really lose out to other weapons for later single strong foes/bosses EXCEPT Fisticuffs, which 'rangs are superior to for the Hero (since he can't quite match Yangus' raw strength). You can naturally use Boomerangs as a sub-weapon. However, it is NOT a good idea to put any more than 18 points in them. The later "throw" skills are not worth the precious points you might put into them at all.
Beginner:
100 in SWORDS. Swords are pretty much your best friends throughout the journey. They come in abundance and are easily the best weapons for your hero quite often. One of the best swords you can get, Uber Falcon Blade, when combined with the Falcon Slash skill, lets you hit 4 TIMES. Combine that with tension and attack boosting spells and items and you'll see high single-foe damage very often. Metal Slash is good early on, but sucks on stronger metal foes, even with the UFB. Flame slash is good on stronger foes and Dragon Slash is great for the somewhat common lizard-ish foes you may face (occurs more later on). Miracle Slash is okay, but best used with the Miracle Sword or an auto-healing armor. Gigaslash is of course, excellent, just be aware that it changes to GigaGash after you master Courage. If you go with Swords, you should consider Boomerangs as a secondary and only apply 18 points to it for Power Throw. The overall damage will be less, but you won't lose damage per each consecutive foe hit like normally.
Advanced:
100 in SPEARS. Spears have much more versatility than swords and 'rangs in skills, period. However, it's a bit harder to get them, and they can be a bit weaker than swords as a result. So why use them? Well, for starters, they are THE fastest-to-learn skillset to level that the Hero has. So you'll have every spear skill except the last at 77 as opposed to high 80's and 90's for others. Their skills are pretty much all good too, but technical. Mercurial Thrust assures you'll strike first, but at lessened damage. It's handy for any healing or reviving monsters that pop up or aren't dead, and its allies are ready for restoration. Thunder/Lightning Strike is THE skill to kill stronger Metal Monsters with. The hit rate may be a dodgy 50%, but an insta-crit is far better than minor damage. Multistrike is good for a small group of foes or single strong enemies due to it's extra hits. However, if you encounter a single large group (say 5-8 or so), then by all means go with Clean Sweep, even if, like whips, the damage is lessened per consecutive foes. Better to weaken them all then only kill a few. The ultimate skill of Spears, Lightning Storm, is a doozy, costing 25 MP per shot, BUT it does 190-220 BASE damage to all foes, as in WITHOUT TENSION (and can even be boosted by it!). Worth the wait? Well, it's up to you, but quite a few think it's great if you can survive the Spear drought (some can't). Hero Spear is even better than Uber Miracle Sword, despite that it can take more time to get, but it is well worth it.
+Yangus+
Mandatory:
66 in AXES, but no more than 82. Yangus' axes are just excellent. His first skill, Helm Splitter, can reduce enemy DEF and can even work on bosses. Hatchet Man/Executioner are just as good as Thunder/Lightning Thrust. Paralax's handy effect of paralyzing a foe and dealing roughly 50% more damage is very nice. Finally, Axes of Evil's group assault makes him more versatile, even if it does come a bit late. Typhoeus' Maul comes way too late to be handy and is pointless when you have Paralax which does roughly the same damage anyways. Most foes you face probably won't even get the Beast family damage it offers either. Other than that, Main Axes and never look back.
Supplimentary, yet helpful:
100 in FISTICUFFS. Fists are roughly akin to the Hero's Boomerangs, but better because these stay free and Yangus soon gets physically strong enough to take advantage of not equipping a weapon, especially with his later great skills. Knuckle Sandwich is pretty much the only one that sucks later on and you'd be better off using a weapon than that. Do what you can to get 42 points in Fisticuffs for Thin Air. Not only is it cheap, but it can be boosted with Tension and doesn't reduce in damage for each consecutive foe hit. Padfoot is only really helpful if you want to evade battles on the way to a town, otherwise, it's better to stick it out for the sake of mastering fists at least. Multifists is only really "decent". Once again, you're better off with a weapon versus a single foe. But, against a small group, this can be a bit better than Grim Reaper at times. Boulder Toss is absolutely BADASS though. Hitting all enemies for 4 MP at pretty good damage that can be Tension'd is VERY nice. You should stick with it over Thin Air once you finally get it.
70 in SCYTHES minimum. Scythes are pretty much mandatory late and post-game to horde rare items and Seeds of Skill. Before that, they are fairly decent, though not great. Wind Scythe is pretty decent when you want to cause some direct damage to a foe, but don't expect much at anytime, even with Tension. Grim(mer) Reaper is roughly the same as Axes of Evil, however it can occaisionally insta-KO some of the enemies it hits. It's a pretty low chance though, but hey, you might as well try. Stainless Steal Sickle is the only skill you should bother stealing with. The steal rate is LOW, but it can be boosted if you paralyze an enemy or put it to sleep before use. Note that Tension ONLY increases damage dealt, not the chance of stealing. Big Banga is the final skill learned at 100 points, but it's worth depends on how drained your allies' HP and MP is. Only if Yangus has MP to spare, and the enemy party only has roughly an average of 160 HP left, should you want to bother with it. Otherwise, it's way too pricey if you can hold out to use 2 or 3 Boulder Toss-es for roughly the same damage at a much lower MP price.
Noteworthy:
DON'T USE CLUBS. Heart/Mind Breaker don't work enough to justify and Paralax does the same thing, but with better damage. As for Penny Pincher/Gold Rush, Why bother stealing pocket change when you could steal much more valuable ITEMS (even though the rate is lower)? The Monster Masher/Devil Crusher is also pointless, because once again, Paralax does roughly the same damage boost anyways.
SAVE HUMANITY FOR LAST. Heal and Midheal aren't that effective when he gets them, as he's better off using items or a Sage's Stone if you have a spare. WarCry/UnderPants Dance aren't that effective, and you effectively waste a turn by dealing nothing if a foe evades it, not to mention neither work on bosses. Kerplunk is VERY situational, and Yangus is MP-less and dead afterwards anyways, which lessens his helpfulness once revived. Still, if he's the last ally left and everyone else can finish the job where he can't, go for it. Kabuff on a second user helps quite a bit, but you may not need it if you get the staff that can cast it for free when used as an item. Golden Oldies is eventually good, but takes a good while to get there (Level 50 or so) and can't be boosted by tension, so don't even bother with that.
+Jessica+
Mandatory:
23 minimum in WHIPS, but 68 maximum. Jessica's whips are surprisingly useful. Twin Dragon Lash, which you get at 23 points, is generally agreed to be FUCKWIN for her, especially against bosses. Whiplash's chance of inflicting paralysis is decent but you may not feel like bothering until it upgrades to Lashings of Love at 55 points, the extra damage really helps along with the better rate of paralysis. Lady's Thong is okay, but Queen's Thong is NOT worth the upgrade, which is why you should stop at 68, which is the final attack bonus for whips. Serpent's Bite sucks. Plain and simple. Lashings of Love is better, if only for the added paralysis, not to mention it is cheaper as well.
31 minimum in STAVES. For 31 points, she gets some great spells. Acceleratle bumps the party's speed up, and is very handy against fast enemies and Metal Slimes. Kasap is good for groups of high defense and HP foes, especially if they like to defend (but stick to the normal version for single opponents). Bounce reflects ALL spells (harmful and helpful) back to the caster, so be aware of that before you use it. However, it's great for strategies and magic-spamming enemies, especially if they use the Thwhack-family of spells. Magic Barrier reduces spell damage, but also reduces the chance of having negative status/ailments inflicted on the party as well. Should you decide to continue with Staffs after 31 points, do so after you've gotten Whips mastered. Caudeceus is helpful for exploring when you don't want to use too much Midheal or Items, and it even boosts with Tension. MP Recovery is also handy for enduring harsh new areas or long fights. Kazing, despite the Hero and Angelo getting it, is always useful, but you do have to consider that Jessica may die before them, so yeah. Note that the MP boosts are ONLY effective when she equips a staff. The best way to take advantage of this is to equip a staff before you crash at an Inn and use the extra MP on your way to the next area you'll venture to.
Variable:
18 minimum in SEX APPEAL. "Charming" enemies works notably better than attempting to stun them for a turn with skills like Warcry. She can first be able to do this at 18 points with a 1/16 chance of stunning a foe struck. It may not seem impressive, but given how many foes she can hit with whips, this can be very handy, especially against groups of spell-spammers. The next upgrade is REALLY late at 78 points, but doubles the rate (and it can be further increased with sexy clothing (noted when she changes appearance in towns and party talk)). Fuddle is lame unless you're up against enemies with high power that can smack around their buddies easily. Kasnooze is kind of pointless though, especially given the advantages of charm attacks. Don't even bother with the attack skills. They universally suck and are only for your amusement. The sole skill worth using from here is Hustle Dance, and that's only really worth it if you give other allies Sage's Stones. It can be increased by tension, sure, but taking 100 skill points to get can be pretty bothersome, especially if you go further than than 31 points with Staves. Unless you have a strategy that revolves around using this, don't go past 18 points.
POINTLESS:
DON'T USE FISTICUFFS. Jessica does not have the raw strength to make use of this set at all. On top of that, she ONLY gets the lowest tier skills from the fellas' fisticuffs sets. Increased Evasion is actually good, but she has to be weaponless to take use of it. Honestly, you'd just be better off casting Acceleratle. Magic Burst SOUNDS kickass, but it's not going to do anything more than take off a few rounds of fighting. On top of that, it leaves her without any MP. Unless you want to blow ALOT of time and money to get tons of Elfin Elixir, don't even bother. The worst thing is that it's her last skill, meaning you have to waste points on useless skills ahead of time. Fuck that shit.
DON'T USE KNIVES/SWORDS. Jessica has TWO skill-families she gets from this skill tree, and they both suck compared to whips. One is the Toxic Dagger/Sword, which does a little bit more damage and can poison an enemy. The thing about this is, by the time said enemy is poisoned, one of the guys is gonna smack the shit out of it anyways, so why bother? The other skill sounds good, but isn't. Assassin's Stab/Sudden Death can insta-kill an enemy, and Sudden Death does 50% more damage than normal attacks. Okay, but let's face facts: 1) Insta-kill never works on bosses. 2) Twin Dragon Lash hits twice, and does notably more damage. 3) Assuming you were going to use this on Metal Slimes, the Hero and Yangus have a far better chance of taking them out, and Angelo actually has skills that are better at insta-kills than a single slash chance. In addition to that, you have to focus your points on a weapon that's shitty for her compared to the usefulness of whips. All in all, Knives are a VERY close second at biggest waste of points for Jessica. Regardless of how effective swords can be, she just lacks the power for them.
+Angelo+ MANDAFUCKINGTORY:
76 in BOWS. HOLY SHIT. Pretty much everyone uses bows with him, and the reason is MULTISHOT. But before that, let me break some other stuff down first. Sandman's Arrow can be effective at times, but only if you're up against a high HP foe susceptible to sleep. It's best used in combination with Cherub/Seraph's Arrow, which recover Angelo's MP from some of the damage he deals. Have others defend while he jabs a sleeping enemy and he can restock quite easily. Needle Shot can insta-kill a foe, or do 1 damage if it fails. It's upgrade, Needle Rain, strikes 4 times in the same way. These SOUND good for Metal Slimes, but you're better off using Metal Slash with a Falcon Sword, since Needle Rain comes late at 100 points, and 2-4 damage is better than 1 from Needle Shot, since the insta-death chance is always pretty low. Now, MULTISHOT. 3-4 hits at 50% damage, on random enemies. Same as Multithrust right? Not quite! Angelo's bows are generally pretty damn good. Not only that, but you can use alchemy to get some pretty good ones early on. Because of this, adding tension to the mix makes this skill pretty much his trademark move. Depending on how you allocate your skills, you may or may not want to raise your bow points to 88 for Shining Shot. It's a 10 MP, strike-all-enemies skill that does roughly 110 base damage to all foes without reduction of damage with each consecutive foe hit. If you like Swords and want to level those skills to maximum, you may pass on it, since there's no other bow attack upgrades past 76.
Not as Mandatory, but still Mandatory:
13 minimum in CHARISMA, but 27 maximum. There's only 3 necessary things you get from this, and that's all you really need. They are: Squelch (de-poisons an ally), Divine Intervention (increases spell-damage you deal), and Sarcastic Snicker (lowers one foe's tension by a level). Fuddle is as iffy as ever and Angel Eyes is as useless as Jessica's Sex Appeal attacks. Well, what about Pearly Gates, the ultimate Charisma skill? DON'T BOTHER. It's almost as good as Lightning Storm, doing just a slight bit less at 5 points less, but here's the problem, it ONLY hits a group, instead of all enemies. For a spell that pricey, you might as well use something else. The other skills are pointless too. It's rare to see groups have tension, so Chilling Chuckle is pointless. Charming Look is as shitty as Angel Eyes when you finally get it. Kafuddle isn't that beneficial considering you'd only bother with Fuddle in general when all enemies are one large group or a strong one can help pound a smaller group. And Ban Dance? Tough luck. Real badasses ain't afraid to bust-a-move.
9 minimum in STAVES, but 65 maximum. Unlike Jessica, Angelo's bonus spells aren't quite as great, but are still pretty dang useful. Dazzle can be good for enemies who rely on physical strength, especially if they have any multi-attack skills. Fizzle stops enemies from using spells, so it's great against magic-spam, and even works on a number of bosses. Bounce works the same as Jessica's. After that, it's up to you on whether you want another Oomph caster to power up your attacks or not. Drain Magic is less effective than Cherub/Seraph's Shot, which also does damage while stealing MP. Caduceus is as useful as ever for exploring. Kathwack is the last offensive spell learned from Staves, but can clear out the entire battlefield of enemies! It's not too expensive either. The issue here is that they have to be vulnerable to it, and it's not always successful. Some or all enemies may be left standing so be cautious. The MP boost of holding a staff, along with MP Recovery isn't necessary at all, since you can just bow and arrow your MP back to speed when you drop low.
Hero-Dependent:
100 in SWORDS. Angelo learns everything the Hero learns in Swords except for Dragon Slash, and instead of Gigaslash, he learns Lightning Storm. As mentioned before, Lightning Storm is kickass at kicking enemy ass. However, you'll likely use it just a bit more sparingly with Angelo, since even with Cherub/Seraph's shot, he doesn't get an MP reduction boost like the Hero. Angelo can easily take on bosses with Multishot, so why bother with swords then? As the title mentions, depending on how you flow with your Hero, he may never even use swords once he gets a spear. If that's the case, why waster those blades that can be used by Angelo (because it's still not recommended for Jessica). Flame, Miracle, and Falcon Slash (especially the last) can be quite good on strong enemies you face, even though Bows are often better for bosses. A BIG advantage he has over the Hero's Sword mastery is that he learns his skills MUCH earlier (aside from Lightning Storm, of course). If you don't pump up Staves and Charisma past the recommended minimum, you may consider putting some points here as a supplement to Bows. Your call.
Fisting Failure:
DON'T USE FISTICUFFS: Like Jessica, Angelo doesn't have the raw strength to make up for being weaponless. He gets Evasion Up much earlier than Jessica, but he doesn't have the spell variety she does to utilize this. Plus, again, why bother once you've learned agility up spells? Like the Hero, he learns Defending Champion, but for roughly 50 points more! Too much to be useful, especially when it saps from your more useful trees. At 100 points, He learns Miracle Moon, which is a stronger Harvest Moon. Both hit all enemies, but the upgrade recovers HP. Here's the problem: the damage dealt is divided evenly between foes and a TENTH of that average is absorbed as HP. So not only is this 100 points skill weaker than Shining Shot and, more importantly, Lightning Storm, but the benefit is worse than Miracle Slash's which costs less points, provides more HP to boot, and has pretty much set you on the path for getting Lightning Storm anyways. Why waste your points on a huge stack of shit skills? Fuck that and stick with Bows and/or possibly Swords. You won't regret it one bit.
-Early Helpful Alchemy-
Snakeskin Whip = Leather Whip + Scale Shield (Note: Keep this for later after you buy something better. You can fuse it with two Dragon scales for the Dragontail Whip, which can sell pretty well even if you don't need it.)
Hunter's Bow = Short Bow + Chain Whip (Note: Fuse the Hunter's Bow with a Garter Belt for the Eros' Bow, which is even better! Most of the ingredients are rather easy to find early on as well.)
Reinforced Boomerang = Boomerang + Iron Nail (Note: Be sure to have the Thief's Key first! Iron nails aren't too common early on, but this is a good early 'rang for multiple enemy whomping if you find some more Iron nails.)
Golden Axe = Iron Axe + Gold Nugget (Note: Fuse with a Slime Crown for the King Axe, which has a whopping 80 attack!)
Agility Ring = Prayer Ring + Seed Of Agility (Note 1: It can be hard to comeby seeds in general so save them for alchemy!) (Note 2: 2 Agility Rings+Orichalcum make a Meteorite Bracer, but you can't do this until later on.)
-Notable Special Monster Teams-
As you are journey to become gusto enough ragazzo to rise through the ranks of the monster arena, you might have noticed having certain monsters on your main team gives them a "title" of sorts. These "special duos" and "special trios" get bonuses from their buds, and as a result can be better for battling along with your party or in the ring at Morrie's place (though sometimes it's better to just use the best monsters you have). The following "special" teams stand out above others, so consider giving them a shot if you aren't sure on a custom team of your own:
Duos
-"Metal Power": Metal Slime+Liquid Metal Slime- Special Duo Skill: Magic Burst: uses all MP for damage.
Metaly (Metal Slime)
Start: HP: 3 MP: 64 Attack: 36 Defence: 499 Agility: 65 / Level 99: HP: 3 MP: 64 Attack: 129 Defence: 970 Agility: 122
Found At+When: Around the southwest end of the gate to Alexandria-day/night, just south of Alexandra Tower (before you reach the beach)-day/night, grassland northeast of Port Prospect-day/night
Skills: Attacks, casts Frizz, casts Frizzle
+
Metabble (Liquid Metal Slime)
Start: HP: 6 MP: 96 Attack: 65 Defence: 715 Agility: 125 / Level 99: HP: 6 MP: 96 Attack: 205 Defence: 985 Agility: 204
Found At+When: Island to the west of Maella Abbey-day only, small island south of Neos-day/night, small island in southwest corner of the world-day only, fly south of Empycchu and land just to the east of the Godbird's Eyrie-day
Skills: Attacks (can have 2 turns per round), casts Sizz, casts Kasizzle
-"The Dynamic Duo": Mohawker+Buffalogre- Special Duo Skill: Sapper Slapper: Attack and reduce the Defence of an enemy.
Spike (Mohawker)
Start:HP: 382 MP: 35 Attack: 147 Defence: 126 Agility: 103 / Level 99: HP: 575 MP: 35 Attack: 219 Defence: 144 Agility: 122
Found At+When: Cape West of Pickham-day/night
Skills: Attacks, casts Multiheal
+
Orrid (Buffalogre)
Start:HP: 613 MP: 0 Attack: 244 Defence: 138 Agility: 104 / Level 99: HP: 634 MP: 0 Attack: 249 Defence: 150 Agility: 114
Found At+When: Southeast of Empycchu-day/night
Skills: Attacks-can make a desperate attack, builds Tension
Duo/Trio
-???? duo: Gigantes+Gigantes or Cyclops- Special Duo Attack: Sapper Slapper: Attack and reduce the Defence of an enemy.
-???? Trio: Gigantes+Gigantes+Cyclops- Special Trio Bonus: Able to fight for 4 rounds when Call Team is used / Special Trio Skill: Mind Breaker: All 3 monsters attack one enemy
Brontes (Gigantes)
Start: HP: 826 MP: 0 Attack: 279 Defence: 157 Agility: 94 / Level 99: HP: 864 MP: 0 Attack: 282 Defence: 166 Agility: 99
Found At+When: West of Empycchu-day only
Skills: Attacks-can make a desperate attack, stomps with its enormous foot
+
Steropes (Gigantes)
Start: HP: 888 MP: 0 Attack: 278 Defence: 149 Agility: 108 / Level 99: HP: 959 MP: 0 Attack: 329 Defence: 200 Agility: 173
Found At+When: Beach west of Princess Minnie's Castle-day/night
Skills: Attacks-can make a desperate attack, stomps with its enormous foot
+
Arges (Cyclops)
Start: HP: 710 MP: 0 Attack: 245 Defence: 117 Agility: 123 / Level 99: HP: 760 MP: 0 Attack: 255 Defence: 124 Agility: 159
Found At+When: Go to the back of Tryan Gully by walking/flying all the way around the island-day/night
Skills: Attacks-can make a desperate attack, stomps with its enormous foot
Trios
-"The Slime Squad" Slime x3 (each found seperately)- Special Trio Skill:Sometimes all three combine into the Ultra Slime, Ultrus.
Smiles (Slime)
Start:HP: 42 MP: 0 Attack: 26 Defence: 53 Agility: 63 / Level 99: HP: 197 MP: 0 Attack: 270 Defence: 175 Agility: 242
Found At+When: Just outside of Trodain.Enter the castle, then leave and he'll be there-day/night
Skills: Attacks
+
Slime (Shady Slime)
Start:HP: 89 MP: 0 Attack: 89 Defence: 100 Agility: 86 / Level 99: HP: 228 MP: 0 Attack: 188 Defence: 179 Agility: 113
Found At+When: West of Chapel of Autumn-day only
Skills: Attacks
+
Tori (Slime)
Start:HP: 117 MP: 0 Attack: 47 Defence: 151 Agility: 108 / Level 99: HP: 243 MP: 0 Attack: 316 Defence: 294 Agility: 212
Found At+When: Southwest of Empycchu-day/night, northeast of Empycchu-day/night
Skills: Attacks (can have 2 turns per round)
-"The Drack Pack": Dracky x3 (each found seperately)- Special Trio Skill: Sometimes all three monsters will combine into Gracky, the Great Dracky
Slurpy (Dracky)
Start:HP: 99 MP: 0 Attack: 119 Defence: 140 Agility: 144 / Level 99: HP: 231 MP: 0 Attack: 245 Defence: 206 Agility: 240
Found At+When: North of Mystical Spring-day/night
Skills: Attacks
+
Sippy (Dracky)
Start:HP: 139 MP: 0 Attack: 130 Defence: 113 Agility: 100 / Level 99: HP: 231 MP: 0 Attack: 213 Defence: 201 Agility: 179
Found At+When: South of Waterfall Cave-night only
Skills: Attacks
+
Sugi (Dracky)
Start:HP: 102 MP: 0 Attack: 63 Defence: 163 Agility: 134 / Level 99: HP: 267 MP: 0 Attack: 216 Defence: 210 Agility: 257
Found At+When: Flying spot east of Godbird's Eyrie-night, flying spot southwest of Dark Ruins-before mid-day/night
Skills: Attacks
-"My Three Golems": Stone Golem+Gold Golem+Golem- Special Trio Skill: Sometimes all three monsters will combine into the giant golem, Mazin ./ Special Trio Bonus: Able to fight for 4 rounds when Call Team is used.
Stoneman (Stone Golem)
Start: HP: 560 MP: 0 Attack: 275 Defence: 255 Agility: 100 / Level 99: HP: 810 MP: 0 Attack: 308 Defence: 306 Agility: 110
Found At+When: Flying spot southwest of Dark Ruins-day/night
Skills: Attacks-can make a desperate attack, builds Tension
+
Goldman (Gold Golem)
Start: HP: 306 MP: 0 Attack: 183 Defence: 144 Agility: 57 / Level 99: HP: 438 MP: 0 Attack: 296 Defence: 234 Agility: 103
Found At+When: East of Neos-day only
Skills: Attacks-can make a desperate attack
+
Brickman (Golem)
Start: HP: 260 MP: 0 Attack: 132 Defence: 89 Agility: 37 / Level 99: HP: 743 MP: 0 Attack: 297 Defence: 302 Agility: 165
Found At+When: East of Peregrin Quay, at a ruined temple-looking area. Look around inside the remains-day/night
Skills: Attacks-can make a desperate attack, builds Tension
-"The Zombebops": Hork+Deadnoble+Capers- Special Trio Bonus: Max HP +30 to all three monsters
Hork (Walking Corpse)
Start: HP: 285 MP: 0 Attack: 105 Defence: 33 Agility: 52 / Level 99: HP: 816 MP: 0 Attack: 248 Defence: 40 Agility: 113
Found At+When: Swamp southwest of Swordsman's Labyrinth-day/night
Skills: Attacks-can cause Poisoned status and also make a desperate attack
+
Deadnoble (Bone Baron)
Start: HP: 418 MP: 0 Attack: 158 Defence: 116 Agility: 68 / Level 99: HP: 490 MP: 0 Attack: 260 Defence: 280 Agility: 207
Found At+When: East of Dark Ruins-day/night
Skills: Attacks, draws a crest in the air
+
Capers (Phantom Fencer)
Start: HP: 319 MP: 0 Attack: 206 Defence: 95 Agility: 103 / Level 99: HP: 665 MP: 0 Attack: 303 Defence: 205 Agility: 227
Found At+When: Beach before Wisher's Peak-night only
Skills: Attacks, uses Thunder Slash
-"The Nightriders": Slime Knight+Skullrider+Bone Baron- Special Trio Skill: Riders' Carnival: All 3 monsters simultaneous attack one enemy.
Slimehopper (Slime Knight)
Start: HP: 152 MP: 11 Attack: 93 Defence: 85 Agility: 61 / Level 99: HP: 485 MP: 34 Attack: 296 Defence: 296 Agility: 205
Found At+When: Just a little northwest of the entrance to the Waterfall Cave-day/night
Skills: Attacks, casts Heal, launches a flying attack
+
Jockey (Skullrider)
Start: HP: 320 MP: 0 Attack: 149 Defence: 162 Agility: 126 / Level 99: HP: 359 MP: 0 Attack: 201 Defence: 244 Agility: 248
Found At+When: Southeast of Dragon Graveyard-day/night
Skills: Attacks (can have 2 turns per round), Flame Slash, sweep an enemy's legs with tail
+
Deadnoble (Bone Baron)
Start: HP: 418 MP: 0 Attack: 158 Defence: 116 Agility: 68 / Level 99: HP: 490 MP: 0 Attack: 260 Defence: 280 Agility: 207
Found At+When: East of Dark Ruins-day/night
Skills: Attacks, draws a crest in the air
-"Slime Therapy": King Slime+Healslime+Cureslime- Special Trio Skill: Multiheal (Omniheal?) / Special Trio Bonuses: "The team's HP goes way up." (percentage-based boost?), Able to fight for 4 rounds when Call Team is used.
Hori (King Slime)
Start: HP: 499 MP: 25 Attack: 160 Defence: 105 Agility: 39 / Level 99: HP: 499 MP: 25 Attack: 252 Defence: 247 Agility: 64
Found At+When: Southeastern side of the lake southwest of Argonia-day/night, south of Arcadia-day
Skills: Attacks, puffs up and smothers an enemy, slams its body into an enemy, casts Multiheal
+
Curer (Cureslime)
Start: HP: 371 MP: 34 Attack: 78 Defence: 136 Agility: 111 / Level 99: HP: 384 MP: 47 Attack: 95 Defence: 188 Agility: 229
Found At+When: Forest north of Arcadia-day/night, behind Chapel of Autumn-day/night
Skills: Attacks, casts Fullheal, assesses the situation
+
Healer (Healslime)
Start: HP: 94 MP: 31 Attack: 56 Defence: 77 Agility: 71 / Level 99: HP: 245 MP: 95 Attack: 152 Defence: 248 Agility: 242
Found At+When: West end of the beach south of Alexandria-day/night
Skills: Attacks, casts Heal
-"Triple Trouble": Killing Machine x3 (each found seperately)- Special Trio Bonus: Able to fight for 4 rounds when Call Team is used / Special Trio Skills: Stream Killer Attack: All 3 combo one enemy, Triple Swords: All 3 simultaneously attack one enemy
Nohi (Killing Machine)
Start: HP: 630 MP: 0 Attack: 225 Defence: 200 Agility: 125 / Level 99: HP: 750 MP: 0 Attack: 265 Defence: 280 Agility: 225
Found At+When: Flying spot south of Dragon Graveyard-night only, island west of Lakeside Cabin-night only
Skills: Attacks (can have 2 turns per round), fires a powerful laser beam, slashes viciously, draws its bow and lets an arrow fly, uses Kacrackle Slash
+
Roborg (Killing Machine)
Start: HP: 423 MP: 0 Attack: 173 Defence: 168 Agility: 120 / Level 99: HP: 586 MP: 0 Attack: 222 Defence: 238 Agility: 251
Found At+When: South of Orkutsk-day/night
Skills: Attacks (can have 2 turns per round), fires a powerful laser beam, slashes viciously, draws its bow and lets an arrow fly, uses Kacrackle Slash
+
Cybot (Killing Machine)
Start: HP: 525 MP: 0 Attack: 210 Defence: 175 Agility: 125 / Level 99: HP: 635 MP: 0 Attack: 250 Defence: 275 Agility: 225
Found At+When: West of Orkutsk-day only
Skills: Attacks (can have 2 turns per round), fires a powerful laser beam, slashes viciously, draws its bow and lets an arrow fly, uses Kacrackle Slash
-Websites of Interest-
Dragon's Den - Among their other pages, this gets special notice for having extra content along with videos of spells and skills. Mondo cool.
Dragon Quest IX
This game has so much to talk about, it has it's own pages... Here and its discussion page for various topics related to it that may not quite be in the game itself (tag events, etc.).
Dragon Quest Monsters series
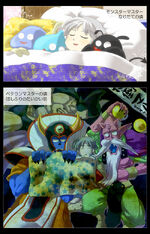
D'aww... They grow up so fast, don't they?
-The Benefits of Item Hunting: Don't Buy What You Can Find! (For DQM 1+2 mainly)-
No point in buying herbs or love-waters when you can find them in open fields, right? Don't think that one item icon means it will always be one thing either. A "leaf" may be an herb, Laural, and so on, but most importantly it may be a WORLD LEAF. These special leaves can revive an ally with full HP and also sell for a good price. A "bottle" may be love-water, potion, and so on, but it might possibly be WORLD DEW, a magical drop that fully restores the HP of all allies -or- ELF WATER, which fully restores the MP of one ally. Both of these also sell quite nicely. However, your chances of getting the good stuff are only in harder areas. It still beats buying though, especially when certain shops have higher prices than normal. That said, some items are worth buying, like SageStone, which can be used multiple times in battle to cast a healus spell on all allies, or Sirloin, the best meat for throwing at monsters you want to recruit.
-Not Enough Golds?-
Gold comes in varying degrees in different games of the Monsters series, for absolute beginners, check below for a few tips to make your wallet heavier. For advanced players, well, you'll probably know these tips already.
+DQM 1+2+
Outside of certain battles, MONEY IS NOT DROPPED IN FIGHTS. However, unlike typical Dragon Quests, it CAN be found in different worlds you visit. The amounts really vary in terms of the little coin icons you find, so be sure to check above for some items that sell for healthy chunks of change.
+Caravan Heart+
Back to the monatary grindstone! Monsters once again drop gold, making GoldSlime a primary target. You can find some random items within the world of Caravan Heart, but not to the extent that you could in 1+2. However, thanks to "Random Events" that pop up in this game Oregon Trail style, getting and losing gold tends to be a real gambling factor. Getting great items from the Fountain Spirit is a nice way to get extra gold when selling said obtainted items. Try to get the Jester's poker event to pop up (happens from a random appearance, not your own jesters). Getting enough tokens and quitting makes him fork over a gold pass, which gives discounts on all buy-able items (but NOT when buying rations!). The Merchants and their penny-pinching skills are only helpful early and post game. Early on, you get a few gold pieces to help your currently low cash flow, but post-game, you can potentially have 4 merchants in a wagon or find an "ascended-class" merchant who has the same skills as 2 merchants or more combined (depending on the capabilities of the ascended class). Between those two points of the game, it's best to leave them at the caravan camp, where they'll run shops with handy items.
+Joker 1+2+
Like CH, monsters drop gold, but randomly-laying-about items are seemingly all but removed (and random OT-style stuff was solely for Caravan Heart). As a result, in addition to fighting Gold-heavy enemies, be sure to sell some of your old gear that you won't need anytime soon, keeping in mind that different monsters can equip some gear and can't equip others (obviously).
-The Miracle of Birth: Getting Newer, Stronger Monsters and Stronger Versions of your Favorite Monsters and Skills-
Has that old slime hit max level? Do you have another monster with a really good skill, but low stats? Well, it's time for them to get frisky and make a better badass. However, you may want either a new monster or keep your ol' faithful. The specifics change a tiny bit for each "era" of DQM games, but generally follow the same rules.
+The 3 essential things to keep in mind when breeding/synthesizing monsters for NEW ones hold true throughout all games+
1) Families- Breeding two monsters of DIFFERENT families (slime, tree, beast, etc.) usually yields a new monster until all combos are exploited, but...
2) Rank- Some new monsters can be gained by breeding different ranks of monster families. These ranks are unseen until Caravan Heart (stars) and Joker (letters), but if you get different results for breeding similar families of monsters, then you know you've got a different rank on your hands. (FAQs also help.)
3) Ancestry- That little "+#" you see after breeding can make a big difference. Sometimes, a combination that would breed one monster may breed a different one when that number is higher. However, these are often "X factors" which I'll touch on later.
+The 2 essential things to keep in mind when breeding/synthesizing monsters for OLD ones hold true throughout all games+
1) Family- Breeding monsters of the SAME family (slime+slime, etc.) usually yields the same monster as the base/pedigree monster, though rank and ancestry may give you a different one, so use a bit of caution.
2) Alternate Combos- Because rank can give you monsters you had before, you might use some strong monsters you aren't fond of and get back your old fave.
+X-Factors+
Even when you think you've figured everything out, there's still things you wouldn't know without an FAQ or Player's guide! Here's some of them to keep in mind:
1) Breeding- Sometimes, breeding certain combos of monsters gives you something else entirely! For instance, try breeding a Slime with a Metal Drak in DQM 1 or 2.
2) Skills (non-Joker only!)- Keeping certain skills may lead monsters to discover a new one! For instance, a skill may grow into a new one when reaching a certain level and stat, like Heal may become Healmore, then Fullheal! Or (in DQM1+2 only!) try to keep Fireslash, Iceslash, Boltslash, and Vacuslash on a monster and see what happens...
3) Skill Combos (DQM2 only!)- With compatible personalities and skills, monsters may combine their skills in battle! Try having two compatible monsters both use Gigaslash. The result can be quite a ripping sensation! They don't learn this new attack, but it's definitely something for you to remember when breeding.
-Caravan Allies; What they can do for you (Caravan Hearts only)-
As you journey, you'll be able to have various "set" allies who can join you in certain towns and cities before post-game, and have random allies pop up at random places post-game. Each of them have different classes and skills, some to use in battles, some passively supporting in battles. and some out of battles. When two or more allies of the same class are put together in a caravan, they combine their skills in a single turn for a much better effect. They'll also give passive skills if the combined rank is good enough. To clarify, you may also find allies who are of higher "ranks" than others. These are great because they have the effects of combined allies, while only being a single unit. Weight is definitely important. The lower, the better, as this lets you add in various types of support for different situations in one go without needing to visit your base camp to swap your pals out. If you can find a high rank ally of a low rate, then you're pretty much set. Eventually, your Caravan may get too big for all of your pals, and someone will need to get kicked out. If you're lucky, the ally leaving will leave behind a replica of their "heart", which you can use when fusing monsters to give them a starting stat boost. The better rank the ally who leaves, the better their heart, and the better the stat boost. You can also get some as Casino prizes if you have a "Player" in your Caravan, though you'll likely need a rank 2 or 3 player (either of which unlock the Poker Table game) to be get nearly enough coins to buy the best hearts. If you kick out allies, they may pop up in a house at "Slimeland", a post-game island, from time to time, so you can re-recruit them if you wish. If you have a rebirther in your caravan, sometimes after battles, an enemy monster may become a human of a random class and rank, and ask to join up.
- Note: If an class has new skills at Rank 2 (R2) or Rank 3 (R3), it can use all the skills of previous ranks. Example: The Dancer gets new dances at R2 and R3, but each can use the old dances as well.
| Class | Battle Active Skill(s) | Passive Skill(s) | Out-of-Battle Skill(s) | Heart |
|---|---|---|---|---|
| Warrior | Single hit on one foe, (R2)/(R3) damage increases with rank | (R3) raises damage dealt by your monsters in-battle | N/A | Boosts base Strength |
| Cleric | Heals guard monster slightly; (R2) heals guard monster more than normal; (R3) heals either all monsters slightly or the guard monster fully | (R3) raises damage dealt by your monsters in-battle | (R2) can call a very basic shop (good for emergency rations); (R3) can call a church (all functions except saving available) | Boosts base Wisdom |
| Mapper | Increase guard monster's speed, accuracy, and evasion slightly; (R2)/(R3) boost increases with rank | N/A | Opens a map; (R2) size and detail up to world map status; (R3) Map is in color | Boosts base Speed |
| Dancer | Chance to make enemies dance; (R2) Reduce all enemies' MP abit; (R3) Can heal all allies' HP slightly | N/A | (R3) can increase rate of random battle encounters when asked | Boosts base Speed (?) |
| Fencer | Two slashes on random enemies or the same enemy twice, (R2) Three strikes instead of 2 but acts the same, (R3) Four slashes instead of 3 | (R3) Each guard monster can attack an enemy group twice, but ONLY in the first round. If the targeted group is defeated after the first strike there won't be a second one (thus the second bonus strike won't hit another group afterwards). | N/A | Boosts base Speed (?) |
| Mage | Uses a Small damage spell; (R2) Medium damage spell, may also use a group damaging spell (R3) High damage spell, may also use a group damaging spell | N/A | (R2) casts Stepguard when asked (prevents damage from harmful floors); (R3) casts Tiptoe when asked (lowers random battle encounter rate) | Boosts base Wisdom |
| Metal Hunter | Deals 5 direct damage to one enemy (R2) Deals 10 direct damage to one enemy; (R3) Deals 100 direct damage to one enemy | (R3) Encounter Metal Slime-type monsters in battles more often, and they even appear in areas where they normally wouldn't be found (!) | N/A | Boosts base ? |
| Knight | Raises all guard monsters defense slightly, (R2)/(R3) boost increases with rank | (R3) No surprise attacks when entering random battles | N/A | Boosts base Defense |
| Sage | Casts small damage or healing spell on enemy/guard monster (respectively), (R2) Casts Medium damage or healing spell like before, can also target enemy groups for damage; (R3) Casts High damage or healing spell like before; can also target ALL enemies for damage | N/A | (R2) Returns the Caravan to the Base Camp when asked; (R3) Teleports the Caravan to any previously visited town/city or the Base Camp when asked | Boosts base Wisdom |
| Medic | Removes poison and sleep from guard monster; (R2) now also removes confusion and curse of guard monster; (R3) now removes all negative status effects of guard monster | N/A | (R2) removes poison from any guard monster when asked; (R3) removes curses from all monsters when asked | Boosts base Wisdom |
| Cook | Heals guard monster's MP by 10; (R2)/(R3) this boosts to 20/40 MP per rank respectively | N/A | Caravan uses less rations when traveling (effect doesn't seem to boost with rank) | Boosts base HP |
others later
-Caravan Hearts Post-Game-
I'm adding this simply because it can be rather confusing without any info. Anyways, that surprise after the ending wasn't ominous or anything, right? Go back to Alefgard and visit Magarula inorder to unlock Slimeland as a location that certain ships can go to. This is important for various reasons, but first: As a result of the Illusions being captured, various orbs are scattered across the land. Some are in red tent caravans, others are found in randomly generated dungeons in the world, and you may get some from the fountain spirit random event if you trade a high level item (World Dew, Elf Water, or World Leaf). They are literally all over the world. Once you get 4 (8 are generated, but you only need 4), you can open up a spirit door in the Slimeland Shrine, fight an elemental spirit, and gain an elemental orb. 8 new orbs have now been generated in new locations (any you didn't find are overwritten), so find 4 more, hopefully fight a new elemental spirit for a new elemental orb. The dungeon unlocked depends on the color-combination used, but having previous elemental orbs seem to improve your chances to get a new one for the first time around. Once you get all 4 elemental orbs, you can save the 4 illusion spirits in a special dungeon. After they're saved, revisit them (using their respective Wings or an R3 Sage's Teleport) to reobtain the Orbs of Loto. Revisit the Loto shrine, and you can take on the boss who's really been behind everything all along. After you beat him and see the second credits, you can take on the Dragon Lord for his monster heart and a get a new Guard Monster. After that, the only things left to do is fill up get every single monster entry, meet Watabou and Warubou in secret dungeons, and see if you can get better allies, since it is unlikely you'll be taking on anyone in real life at this game.
-Joker's Skill System-
+Basics+
Joker uses a skill system like Dragon Quest 8, but also based off of both the classic system of DQM 1+2 and Caravan Heart. Roughly speaking, your monsters get skill set with different names, such as Frizz & Bang, Cure-all, Slimer, etc. Based on the name and description, you should get a rough idea of the skills you can learn from that skill set. When breeding, if you have sets mastered (or for some, a minimum requirement of points in a set), some of them may give you the option to create stronger versions of old sets, or even new ones. This isn't as hard as it seems, as some a good number of skill sets don't have 100 maximum points (some only have 50 or 75), AND you get more skill points at certain level ups than you would in say Dragon Quest 8. Respectively, you get points at Levels: 5, 8, 11, 15, 17, 20, 21, 25, 26, 30, 35, 38, 39, 40, 43, 46, 47, 50, 54, 58, 62, 65, 69, 74, 79, 84, 86, 91, 95, 99
+Breeding and Skills+
When breeding, you can choose which skill sets to give to the child monster. When choosing an old skill set for your new monster, they will have half of the points the parent had in that set, giving your new critter that extra edge to survive. When choosing a new set, you won't have any skill points, because, well, it's a new set. It's pretty much as simple as that.
- Special Note: If you breed a King Slime, you may notice that it might have the "Cleric" skill set. This is a misnomer. It's actually the HERO skill set, and is quite powerful, having many powerful and helpful skills.
+Getting More Skill Points+
Of course, even after breeding and leveling up, one might want to get extra points to speed things up a bit. So here's a few tips on doing that:
1) Getting an extra skill tree: During each level up, monsters with 3 skill trees gain more skill points than those with 2. Giving your monster an extra tree from an item or breeding can be advantageous to them, even if they don't really use it.
2) Finding seeds of skill: ONLY at night, you may find glowing balls of light at some spots. These are Seeds of Skill, items you can use to add a few extra points to a monster's standby total. After that, you can go into the proper menu and add the points in, or just save them for later. These always respawn at the same place, so even if you don't have much to do in an area, you might check every now and then to see if a seed of skill respawned or not.
Dragon Quest Heroes: Slime Morimori (Gusto Slime) and Rocket Slime
MoriMori- Info on the more adventure-ish game will go here.
Rocket- Info on the more tank-battlan game will go here.
Dragon Quest Kenshin and Swords

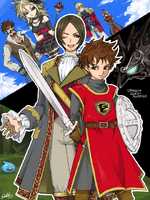
For Avalonia, and for victory, AYM BEFUR YE STURAIKE, mon ami.
+Intro+
You go on an adventure and swing your tiny toy sword/wiimote like a derp at monsters in REAL-TIME. Oh, but that's not all, you can also cast magic and use super attacks! Maybe even save the world while you're at it.
- Note: These are not traditional RPGs or Dragon Quest games, so don't play them like one. Instead, they are more arcade styled, but with extended length and extras due to being on consoles. Just take it easy and have fun.
+Kenshin/Swordmaster (Standalone TV game)+
-"So, where can I find this?"-
GOOD FUCKING LUCK. This thing's been out of print and out of stock in most places for a while. If you are lucky enough to find one in an import store or site, let us know in the discussion page. However, given the rarity of the game, don't expect to spend any less than 50 bucks plus tax and/or shipping and handling. I would recommend Amazon.jp, but I don't know how if they have locations they don't ship to, which could suck for our non-USA pals.
-"What about DEMDOORS man?"-
There's two doors or so that have been giving people who actually have this trouble. Understandable since the game is only in Japanese and will likely not be translated into English EVER. Thanks to DQShrine and some random reviewer for the solutions to these:
Door 1: I'm stuck at a door that needs a combination and I can't read Japanese. What do I do? A: In this case, all you have to do is slash upwards three times.
Door 2: To proceed through the door with the puzzle element to it, after the long battle with the ape boss, you will need to do the following: Slash upwards on the first red circle, leaving the second circle as a miss hit, then slash upwards again for the third circle, leaving the fourth one as a miss, and lastly slashing upwards yet again for the fifth circle to solve the puzzle.
-Links of Interest-
Videos: Live Stage 1 (blurry, but you get an idea of what you look like playing), Stage 2 (Better quality, but still kinda off), BONUS BOSS, Commercial showing an EXTREME TO THE MAX kid kicking ass
Dragon Quest Fan Info Page - French review and direct-feed video of Stage 1
+Swords (for Wii)+
-"So I CAN find this, right?"-
Yeah, Swords is much easier to find. Thankfully, compared to its initial release price, it's actually a considerably more fair asking price of roughly $15-20. You might find it in a bargain bin or rental and/or pre-owned shop typically. You can always search for it on Amazon, where it goes for around the same price, or less if you're lucky.
-Which Element Sword to Use-
Only a few swords are non-elemental. So you'll typically be using one that is an element of some kind. For a large portion of the game, it doesn't really matter much which you use. At the end of the game, quite a few enemies are Fire elemental, so you may want to use the Ice family of swords if you are unsure. Other than that, it mostly depends on what type of master stroke setup you want to use (twirling vs. shaking, etc.)
-Which Ally to Bring-
Each one is pretty good in their own right, but it mostly depends on how you play. If you are unsure of your skill or like to leave AI on alot, use Fleurette, as she has the most healing based spells. If you are split between AI and manual commands, and want someone more well-rounded between attack and support, use Anlace. If you just prefer giving commands and want more offensive power, use your dad, Claymore. Of course, you can always go alone.
-Which Mini Medal Prizes to Get-
The last, Liquid Medal Armour, is definitely the one to really go after, but you likely won't see it for a long time if you aren't patient enough to replay the first level constantly to get 100 Mini Medals. If you think you can live without it (and you probably can), then the first you should get is the Boulderdasher. It permanently lets you break those pinkish-brown boulders that you normally can't break, and get you some minor extras from the hidden paths. After that, Gold Bars should be your next targets if you aren't quite good enough to S rank stage 7 repeatedly. They cost 30 Mini Medals each, so be sure to only get them when you need them. The additional weapons, the Kitten Claw, Astraea's Abacus, and Poison Needle aren't worth using. The first is too weak to be helpful (even when trying for the Renown bonus), the second's effect isn't helpful enough on your cash flow, and the third doesn't work on bosses, so fuck that shit. However, the Abacus sells for 3000 gold, so consider getting one if your wallet's in a pinch and you have 10 Mini Medals to spare. The Life Bracer is a helpful accessory if you aren't feeling too confident in your defending skills, but costs 50 Mini Medals, so don't expect to have it for a while.
-Shield vs SPOOOOOOOON-
You have two choices for defending yourself: A large shield that wears down vs a tiny ass teaspoon made of a magic material that never breaks. Most stick with the shield. Honestly, I think if you've got the skill to use it, the Orichalcum Teaspoon is mondo cool. Not only does it make you feel like a badass blocking assaults like they were nothing, but it also gives you a +1000 score point bonus when clearing stages. However, for the first time you're going through a stage, it is far better to use a shield, especially since some enemies must have their attacks blocked to leave them vulnerable to attacks. In this regard, the fact that the spoon can't be magnified makes it much harder for first time stage runs. Then again, it can't be reduced in size either (it's already tiny enough).
-Dem Gotdang Minigames-
First off, the Tombola is luck-based and cheap as fuck. Don't expect to get the grand prizes without save-scumming like a crazy bitch (i.e. reload constantly). For Slime Attack, the first 75 slimes have pre-set patterns. After that, you just have to trust your own wrist reflexes to finish the job. Rank S score for Crisis nets you a Gold Bracer, a pretty good defensive accessory. Rank X is just a fucking Yggdrasil Leaf, which is far easier to get in Aim High. Hit the Spot sucks. Don't bother as the best prize is one mini medal. Aim High isn't too bad, if you can get a hit in the tiny green circles, you get 200 points. 5 of these or more, in other words, 1000+ points nets you a Yggdrasil Leaf, which ain't too shabby if you don't want to blow your mini medals on them. Shooting Gallery should only be done on Normal, as getting 3500-4490 points gets a Yggdrasil Dew. all the other prizes aren't worth it.
Mystery Dungeon Spin-Offs
What, AGAIN?! FFFFFFUUUUUU-
-Intro to the Series-
Like other Roguelike styled games, this is not your conventional RPG series. As such, you may love it or hate it. Though, it is conventionally like Dragon Quest, as everytime you leave a safe area (a church, your home, going to a lower floor, etc.), you're taking a gamble on whether you live or die. That's basically what this spin-off series is about, taking risks and hoping for pay off. Will you find huge riches, or be slaughtered in a monster lair? That's part of the reason why these sorts of games have attracted so many. The familiar characters, spells, and music-strengthened atmosphere from Dragon Quest are why this spin-off series in particular is loved. You can actually get into this without having played any other DQ game, though it is a bit more fun if you have some basic DQ knowledge ahead of time.
-"Torneko Taloon... Who the hell is he?"-
What, didn't you read the Dragon Quest IV section above? Oh well. He's basically a chubby merchant who was one of the eight heroes in DQIV. His chapter was very unconventional, as it required players to amass large sums of gold to progress certain plot points. It was up to the player how to exactly go about this. He wasn't very strong at the start of his chapter either, so you had to use roundabout ways to conquer foes, like using effects of magic weapons or hiring help from other people. Later, with hard work, he became much stronger. In addition, he would sometimes come across traveling merchants or monsters with better item/gear drops. These elements of unconventional fighting and curious randomization were expanded upon and enhanced in his spinoff games, which unlike the straight and narrow RPG aspects of Dragon Quest IV, became more action-styled, but still required a healthy amount of strategy as well. As his journey ended in DQIV, he took his lovely wife, Nene/Neta/Tessie, and loving son, Poporo/Popolo/Paulo/Tipper/(Nameless in NES original), and set off for new adventures, riches, and hopefully to start a chain of stores to truly become the best arms merchant in all the world.
-General Tips useful throughout the series-
+Chomp Down Excess Medical Herbs and Breads+
Hoyl shit, is this handy! Full HP and/or Belly? Can't pick up that kickass Explosion Scroll? Eat an herb or bread you don't see yourself needing soon. This not only makes room for extra findings, but raises your Maximum HP or Belly slightly! Great to use early on when every point counts, but be careful! You never know when you may need them! Best use them when a room is safe (i.e. only a few monsters, especially when they're far away). Granted, you can technically do this whenever you want, but it's up to you to make sure it's worth doing so. Once again, take a risk and it may pay off!
+Keep Your Distance!+
This should be fairly obvious, but: It's best to keep away from foes when you're not in a good position to fight them. Enemies typically tend to be "sleeping" or unaware of you, letting you sneak by. However, that doesn't mean you can't bash them from afar! If you're in a good position, fire away with arrows or attack wands to whittle them down, then clobber them up close! Throw an ailment-inflicted herb and cause all sorts of nasty effects on your foes, especially those that disorient them. Wand out of charges? Throw it for the same effect or damage it would cause (not like you need an empty wand). You can even hurl equipment you don't need for minor damage (every little bit counts, especially when you're on the run!). Another handy tip is to escape to narrow pathways when surrounded; as that way, you can lessen the number of attacks taken from adjacent enemies.
- Note: I'm not sure how consistent the general formula is in the series, but the damage caused by arrows you fire depends on your Level. So even if your Strength stat has been decreased, you can still shoot for some decent damage where your fists/weapons may normally falter.
+Desperate Times Call for...+
...Using your trump cards or getting the fuck out of there! Seriously. This isn't one of those games where you can save your precious elixirs for later. If you REALLY need a helpful item, don't be afraid to use it! Blaze herbs are best saved for one-on-one confrontations, as they do HIGH damage, but only to the square in front of you. As mentioned before, Explosion Scrolls are handy as they can clear out a number of nearby enemies. Numb Scrolls are good if you have an open getaway path, as they'll freeze adjacent enemies for a while. My personal favorite is the Repel Scroll. Drop it (don't throw or use it!), and as it falls below you, it will stick to the ground, but as long as you don't move from that spot, monsters have a harder time hitting you! Great if you're up for a bit of brawling, but don't want to risk losing loot. Speaking of which, two items in particular are for truly trying times: the Outside Scroll and the Return Herb. The former is for when situations look their most grim, as it lets you escape the dungeon with all of your gear and gold. No sense in losing your hard work, right? The Return Herb, is once again, a risk to take. It warps you to another randomly chosen area in the same dungeon floor. You may end up free from danger or into a worse situation! Throwing it or using an Expel Wand at a monster has the same effect, but on the monster instead.
+Running vs Walking+
If you're in a hurry to speed through a treasureless dungeon, you can run to zip in a straight line until you reach a turn. Be careful though! Dungeon floors can have all sorts of traps. If your HP is reeling, walk, don't run. Before you take a step in a direction, strike the air with your weapon. This will uncover a trap without activating it. That way you can move around it or avoid it altogether.
+Poison?!+
Surprisingly, poison doesn't drain your health. It only lowers your strength stat by one point each time you get poisoned. 1 or 2 points lost don't make too much difference, but past that, it's best to use an antidote ASAP, especially in areas with stronger monsters who fight up close.
-Extra Info on the Spinoff Series and Websites of Interest-
Due to its unconventional nature, this series hasn't had much spotlight outside of Japan. Still, if you're interested in them, you can read some basic info about them here and some links to other pages.
Torneko/Taloon 1- Only on the Super Famicom to my knowledge. Your merchant pal from DQIV decides to expand his market and takes his family to a new location. The gold you earn helps expand your house-shop from a humble shack to a huge store with lots of customers. Later on, you can get more additions like a storehouse to save some of the gear you bring back for future expeditions. A bit basic, but still pretty fun and challenging.
Translation - A translation patch for the ROM , mostly complete aside from some slight errors here and there.
TnD1 GameFAQs FAQ - A text file containing info FAQs on the game, data, and what not
Dragon's Den page - Has info divided onto different pages. Better and worse than the GameFAQs page in some cases.
Torneko: The Last Hope (2)- On the PS1 and GBA (Japan-Only). The only title to make it overseas. This time, the family moves elsewhere to a land with MULTIPLE mysterious dungeons! Much more overhauled than the first game. After you get past the preliminary game, you can change classes to a warrior, who learns skills, or mage, who learns spells. Don't think there's not much more to explore after you've done so either! The GBA game is more pixel-based, but, as far as I can tell, doesn't discard anything in the port process. I don't know if it added anything either though. As you might guess, it's only in Japanese and doesn't have any translation patches I know of.
RPG Shrine - A good amount of data and info to check out. This even has info on some cheats and glitch exploits.
Torneko 3- On PS2 and GBA. Six years after his last adventure, Torneko's still merchanting about. After he and his family take a sailing cruise for their son's 12th birthday, they get shipwrecked in a storm and land in a tropical island. Torneko's son is bedridden with a strange illness, and the village has been having monster problems due to a mysterious dungeon arising. Thus, Torneko sets out to help the island and find a way to heal his son, even journeying to other islands and dealing with their own mysterious dungeons to accomplish the latter. The PS2 version is 3D based and has only the main scenarios, while the GBA version is sprite-based with a few extra side-modes at the start menu, in addition to the main scenario, that can be accessed at any time you choose.
Curiously, a number of additions and revisions have been made:
- Best of all, outside of certain puzzle-based dungeons, your level won't decrease when you die nor do you lose any of your stuff! However, the game is seemingly saved right afterwards, so if some gear of yours got stolen or weakened by traps or monsters, well, consider it fucked until you fix or replace it.
- Eating excess herbs and food does not increse health. Because of the lowered difficulty, there's not much need. Taloon doesn't get as hungry as he used to either, so you don't need to hold onto as much food. Conventional Herbs have been replaced by "healing pots" with certain numbers of charges. Select to "tap" the pot and it will heal you (and ONLY you, so beware) back to full health. When it is empty, throw it away. Herbs with special effects still exist though, and there are also some with new effects as well.
- There is an overworld map of sorts now. It's small and divided into sections, but you can randomly find merchants, random dungeons, or "puzzle" dungeons. Puzzle dungeons are non-random dungeons set up to be solved in certain ways and temporarily drop you to level 1 with no items (most of the time). Random dungeons are just that. Short, random dungeons where you have extra stuff to find and monsters to fight. Essentially, they're best for getting gold or grinding Experience points. Merchants have a typical set of stock, from weapons to items, but can be good if there's not a town nearby.
- You can have a partner from the tropical village join your old pal, Torneko. Depending on how you answer questions from the chief Patriarch of the village, you will have his granddaughter, Ines (a fledgling sage who can cast magic) or her brawling brother Rosa (Yes, that's not a mistake) join you. However, if they die, you must start the dungeon over that you were attempting to beat.
- After you save him in the main scenario, Torneko's son, Poporo, has his own scenario, mode, and dungeons to explore. Like the heroes of Dragon Quest V, he is able to get monsters to help him out. How? Why, just beat the crap out of them and they may revive and join your side. He can have up to 8 with him at one time, and they act on their own accord, though surround him as guardians when no nearby danger arises to distract them. They can even get stronger by leveling up and also be stored with an old man found in certain towns. Very cool and very fun. It's easily the inspiration for and a sort of prototype for the PS2 game Young Yangus, another Mysterious Dungeon game, but one where the monster aspect is expanded, improved, and a part of the main story line.
Extra info about the 3 other characters:
- Ines: As mentioned earlier, Ines is a sage-type of character. She doesn't use items or weapon, but instead uses 3 spells: Heal/Hoimi (on both Torneko and herself), Bang/Io (damages all enemies nearby onscreen), and Squelch/Antidote/Kiarii (purges poison/recovers strength in Torneko and herself). The spells each run on a certain number of charges and once a spell runs out, it can't be used again until the next dungeon. She only uses them when you ask her to though. She can also kick for good damage. More than Torneko's unarmed attack, but a bit (and only a bit) less than his better weapons (like the broad sword or dragon killer). She gets a little stronger each time she levels up and seems to be able to cast spells a little bit more often at higher levels.
- Rosa: Doesn't use spells, but has a few items in his own grayed-out inventory. I've only played with him as my partner for a little while (1 hour), and I've never seen him use any though, so I'm not sure if he ever does or not at higher levels. I know that you likely can't equip him with any of it though. That said, he has higher HP than Ines and he is stronger than Torneko. This is great for stepping back and letting him take out enemies, especially when Torneko's HP is low. One warning though: NEVER FUCK WITH HIS STUFF. You can equip his things (no point since they don't do anything to my knowledge), but if you throw or use any of his possessions, he gets pissed and punches you to death. Dead serious. I don't know if he quits when you go to the next floor of a dungeon, since I've never made it to the next floor when he starts beating me down. Other than that, I'd recommend him as a challenge and Ines for beginners.
- Poporo: After he gets healed by an old sorceress in his pop's story, Poporo is awakened to a hidden talent from his illness-healing spell: He can talk to monsters! Not only that, but they are willing to join him on his own adventures. As a result, he tells his daddy-o to kick back and let him take up the mantle of helping the village. Poporo plays rather differently than his father. The only things he can use like his dad are bracelets, rocks, food, herbs, pots, and spell wands. Melee weapons and shields are too unwieldy for him to use, but he can throw them. He can't read the runes on scrolls, so those are a no go (though, like Torneko, he can throw them for minor damage). And he lacks the finesse and gear to use the long-range weapons like arrows and boomerangs. That said, he can trade mini-medals to the medal king for extra stuff and can equip different types of gloves/claws/gauntlets to help him fight.
Official Website - Pop it into Google or some other translator for some backstory info on the story and characters. Other than that, everything else I've mentioned covers pretty much everything technical you'll see there. English Links? - None in English that I'm aware of...
Young Yangus- On PS2. A mystery dungeon game staring that loveable bandit from DQ8, Yangus, back when he was a lad with a head full of hair. It plays much like the Torneko games do. Torneko guest-stars as his "wise old mentor" and salesman of sorts, while Yangus does the dungeon looting. Like DQ8, you can pass a turn by using Tension to boost your next deal of damage dealt out. There's a strange jar Yangus has that allows him to suck up monsters and pop them out. When popped out, monsters become friendly and tameable. Said friendly monsters can join your dungeon-exploring party as well! Even more curiously, these monsters can even be bred to give birth to stronger monster allies! I'm not sure exactly how these monster systems work, but I really wish someone would work on a translation so we could find out! In addition to the main quest, Yangus can take on bonus dungeons where bosses from other Dragon Quest games challenge him. How he never remembers or brings any this stuff up in DQ8 is beyond me.
A Japanese Cell Phone port exists, but seems to be different and scaled down compared to the PS2 version, since screenshots didn't show any monster pals...
Links? - Nothing I can think of. The official website for the PS2 game is flash-based, making it difficult to use online translators. Other than that, pop the cell phone port into an online translator and see what you can find out.
5th game (?!)- Yes, there actually is a 5th game! Only on Japanese cell phones... Sadly, it looks pretty damn cool too. In addition to having most of the aspects from previous games (from the looks of things, you can only go solo), it takes a page from Chocobo's Dungeon for Wii and Torneko: The Last Hope and allows you to change classes earlier, with many more to choose from than just mage and warrior. Will we ever see it overseas? ...Probably not.
I AIN'T EVEN MAD - Okay, I'm actually mad and sad as fuck. Looking at this cool official japanese website isn't helping.
-Other ChunSoft Mystery Dungeon Games-
Unrelated to Dragon Quest, technically, but the Mystery Dungeon spinoffs follows many of the same conventions as the Torneko games, except in different worlds. They also still have much of the same spirit that DQ and the Torneko series has. ChunSoft made Torneko and both of these, and Koichi Sugiyama does some of the music for the Shiren series, making it have much of the same atmospheric flair as Dragon Quest/Torneko between it and the second. Check them out if you want some more Mystery Dungeon action, but want to give ol' Torneko a break.
Shiren the Wanderer- On SFC and DS. Shiren's first adventure, where he seeks out the legendary Land of the Golden Condor. Most find the DS version to be superior. Closest to Torneko's series.
Shiren the Wanderer (3)- Shiren's 2nd translated journey. Travels with his badass Uncle to solve the mystery of a strange mansion. Keeps most classic conventions, but adds new ones as well.
Pokémon Mystery Dungeon series- Concentrates on learning and using skills and utilizing critter types of you and your enemy. Most different from Torneko.
Mystery Dungeon overview - Wikipedia page containing further titles, some of which are not developed by ChunSoft
Links for more info
Dragon's Den - Pretty much THE source for your Dragon Quest needs. Granted, they don't have everything, but they've got alot!
DQ Shrine - Filled with old official art and info on the games and spinoffs. Most of this is on the "visit the old site" link of course.
RPG Classics - Has info, walkthroughs, and FAQs on the old Dragon Quest/Warrior games up to VII. Very nice.
Dragon Quest Wikia - Fellow wikia that's recently started to pick up speed. Has a bit of info about most games, characters, places, and monsters.
Dragon Quest Dictionary-Encyclopedia - A wiki that has info about various topics of interest. Some are quite extensive, but interesting, such as a table that compares the Japanese spell names to localized names.
GameFAQs - Gotta give credit where it's due, and many of the guides and FAQs were a big help when writing this article.
The Official Japanese Dragon Quest Homepage - Provided you can navigate through the text, you can check out some pretty cool stuff.
No thanks to: Square-Enix of North America and Europe. UPDATE YOUR DRAGON QUEST WEBSITES.